Warning
If you choose to do this canyon, do so at your own risk. It's a more challenging canyon with long rappels and risks of flash floods. If you are not an experienced canyoneer, make sure you go with people who are. I recommend being in decent shape (able to hike 12 miles) and being familiar with rappelling. Don't do this alone (see the movie "127 Hours" — this is the canyon where it happened).
Trip Summary
This adventure earns a hard rating — not just because of the technical challenges, but also due to the remote location, long hike, and need for a car shuttle. It’s not for the faint of heart, but if you’re up for a real canyoneering challenge, Blue John Canyon is unforgettable.
It’s definitely not suitable for kids or inexperienced hikers. Plan for a full day, and go in the spring or fall when the temperatures are milder. Avoid going during the rainy season — flash floods are a real danger.
The cost depends on your setup. If you’re joining a group that already has ropes, you just need the basics: hiking gear, food, water, a harness, and rappel devices. If not, expect to spend around $80 on gear — though you might be able to borrow some from friends.
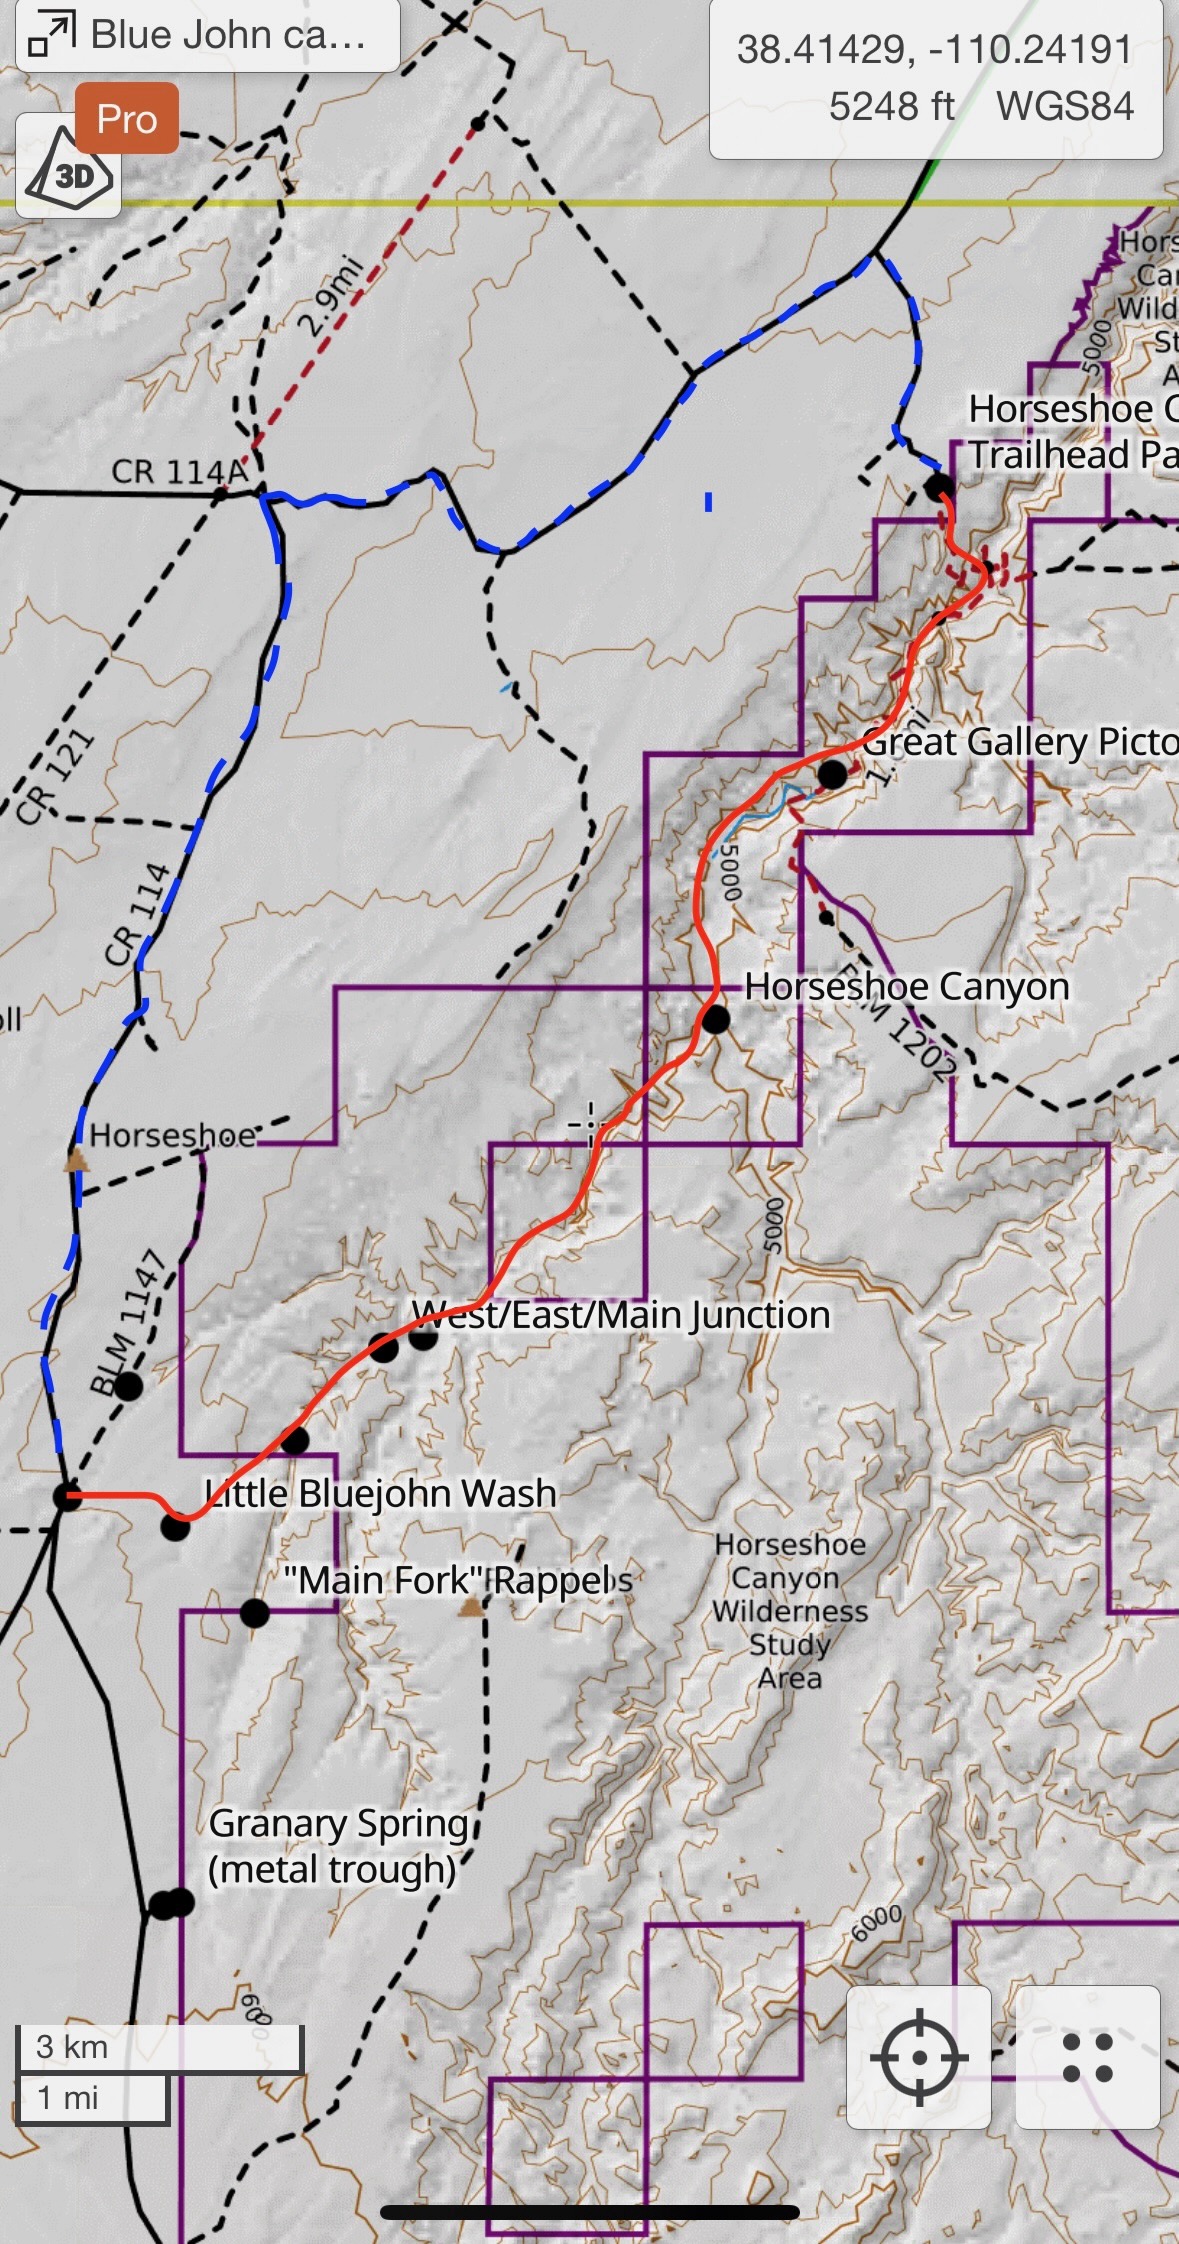
There are several routes into Blue John Canyon. On our trip, we started in Little Blue John Canyon, which fed into the main Blue John slot and eventually led us out through Horseshoe Canyon.
The whole thing took us about 9 hours and covered 12 miles. Little Blue John and Blue John were the most exciting parts — packed with rappels (two big, two small), technical downclimbs, and jaw-dropping slot canyon views.
We exited into Horseshoe Canyon with one of the coolest rappels I’ve ever done. Horseshoe itself is kind of a slog — a wide, sandy wash with little shade and a lot of sun. Still, it has its rewards, like ancient pictographs and sweeping desert views.
The climb out at the end is a leg-burner, but the first half of this trip made it all worth it.
Essential Gear
- Two 60m static ropes in easy to carry rope bags
- Harness + 2 rappel devices (in case you lose one) I love the Sterling Rope ATS Device with the Metolius Steel Auto Lock Carabiner
- Helmet (in case of falling debris on rappels)
- Navigation: GPS device or CalTopo app
- Good day pack for carrying gear, food and water (I used a larger Camelbak)
- Light (for the darker parts of the slot canyon)
- Plenty of water (at least 3L), electrolytes are a good idea (wish I brought some)
- Snacks / meals
- Sun protection (hat, sunscreen, sunglasses)
- Gloves (nice to have for longer rappels)
- Good hiking shoes (there is a lot of walking)
The Beginning and Little Blue John Canyon
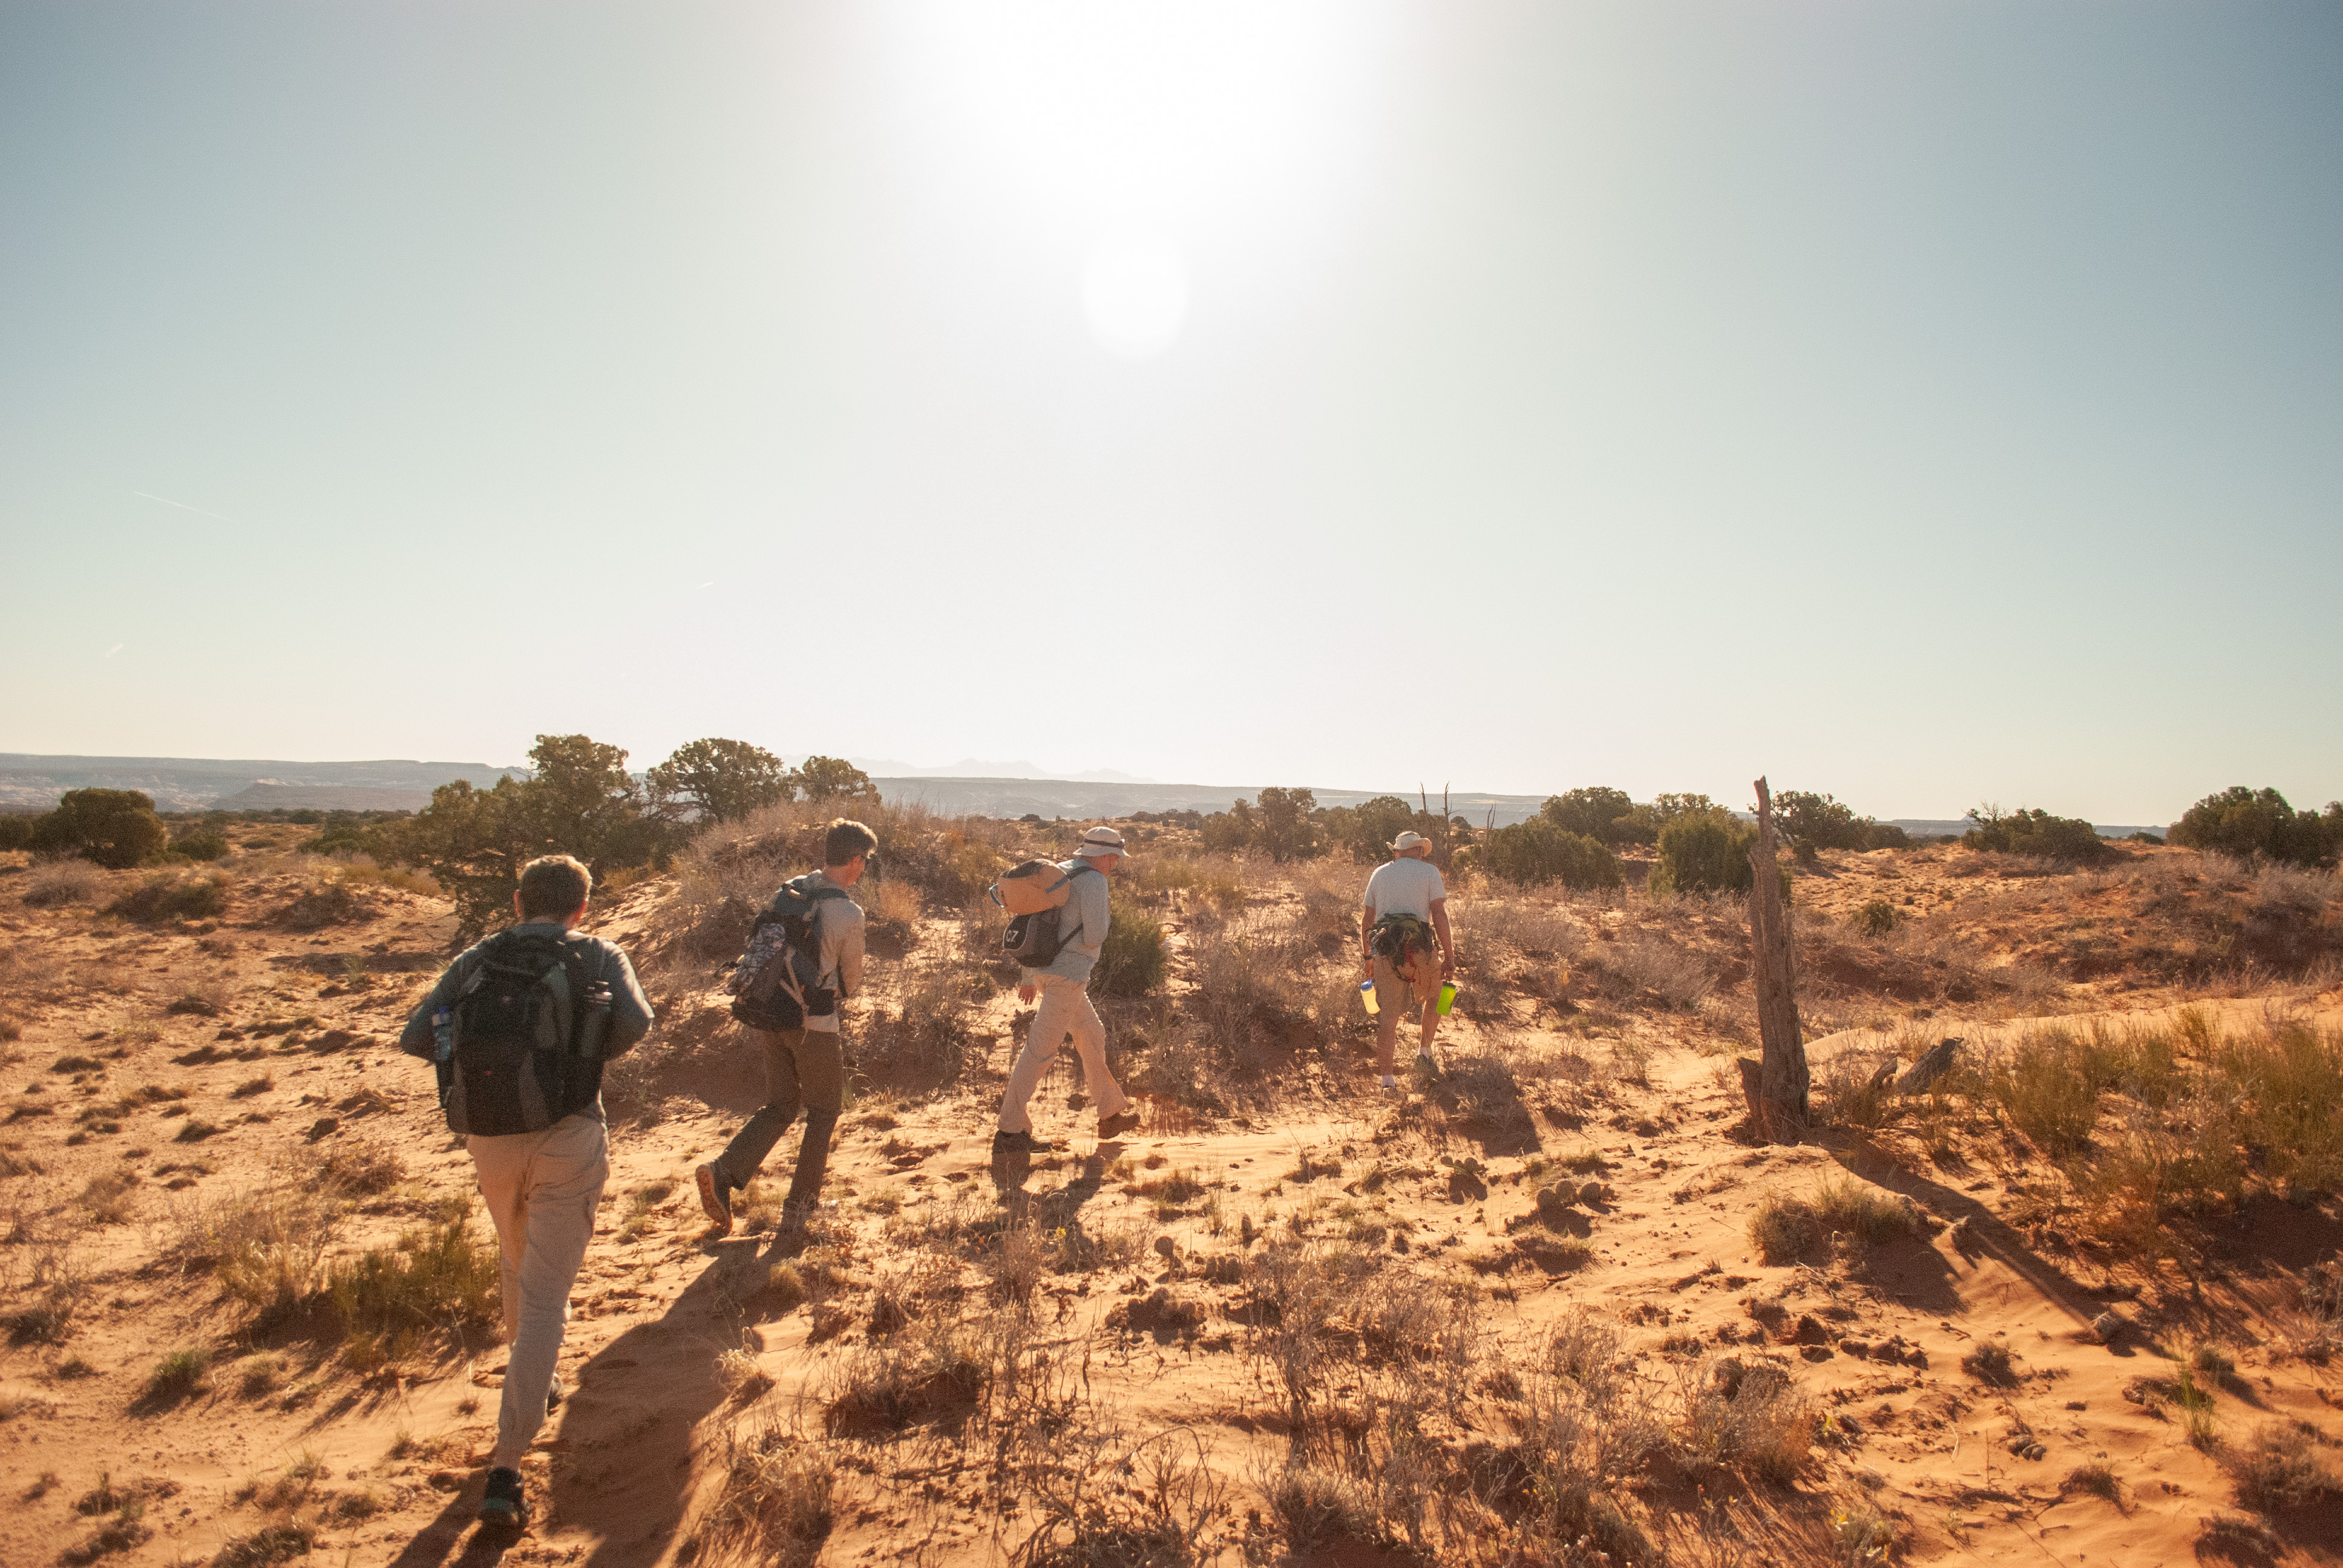
We had camped near the Little Blue John Wash, having dropped off a second vehicle at the Horseshoe Canyon trailhead the night before.
The air was cool, and the sky was just starting to lighten with the sunrise when we woke. We quickly packed up our camping gear, assembled our day packs, and set off.
This is where a GPS or CalTopo app becomes essential — there’s no trail to follow. You’ll want to have waypoints marked in advance to help you navigate.
One other person and I had phones with GPS-capable apps, which made route-finding easier as we moved through the open desert.
If you overshoot the entrance (heading too far north), you’ll have to backtrack since the canyon walls become too steep to descend further up.
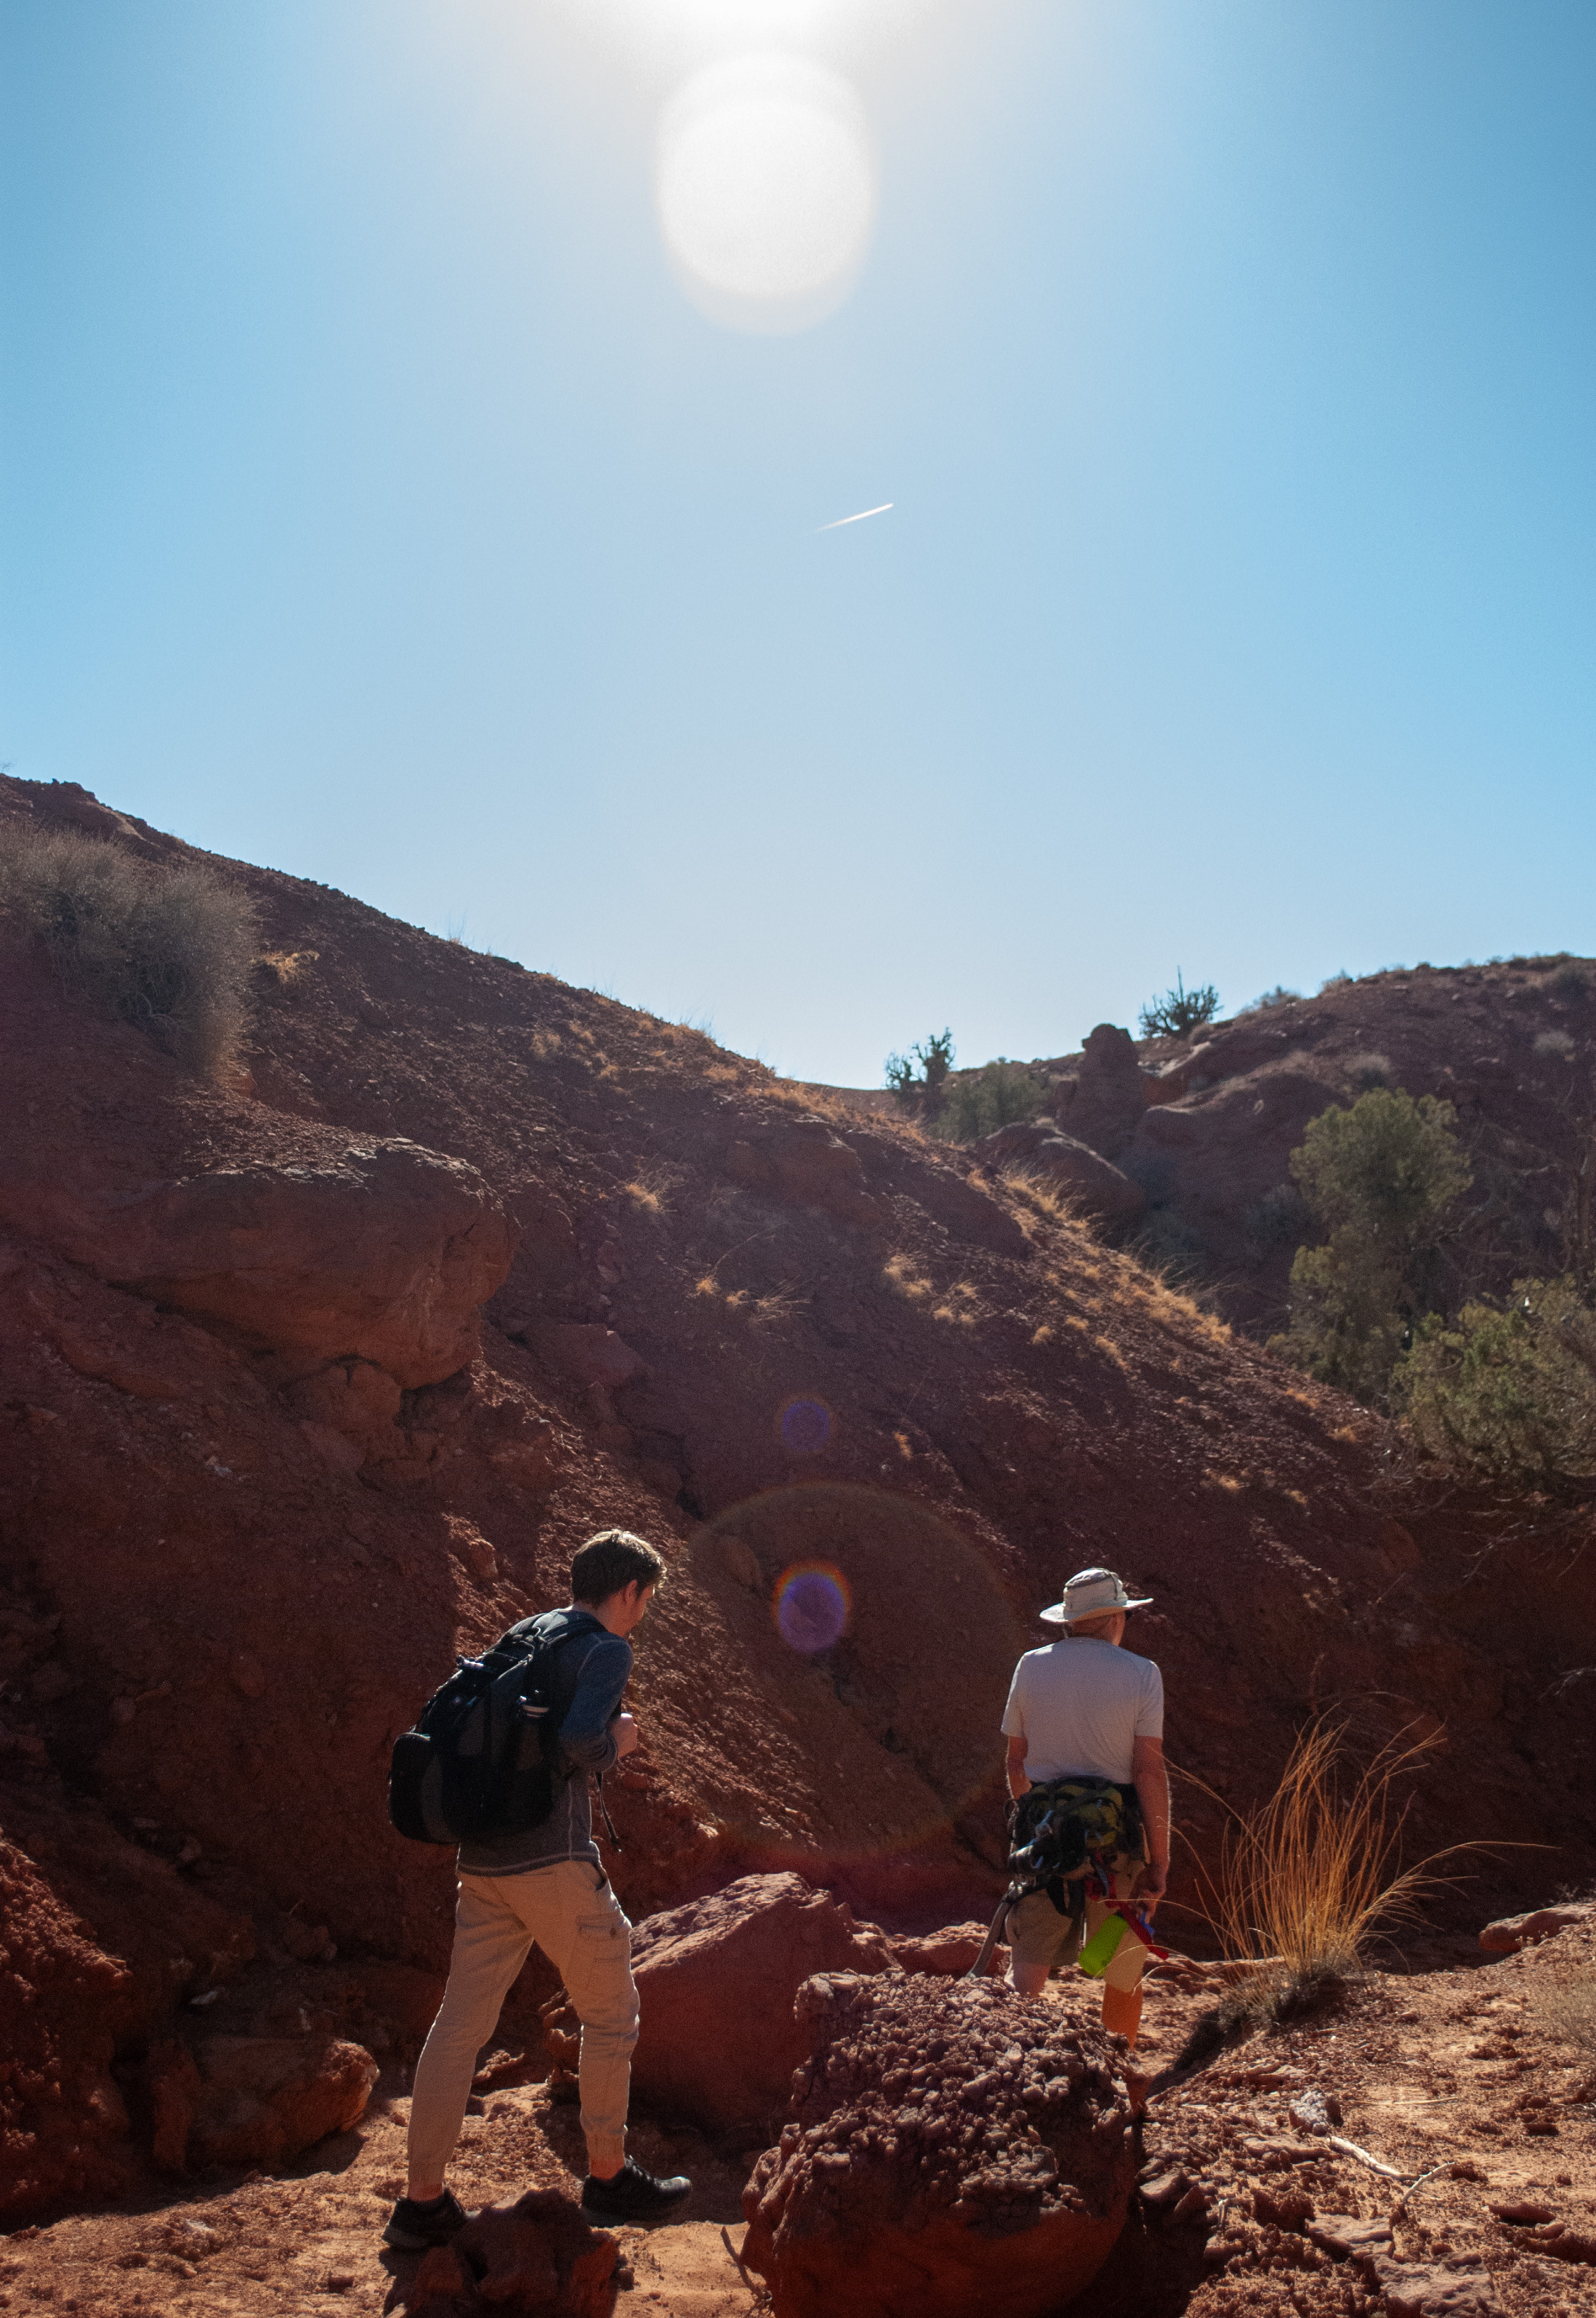
After about 30 minutes, we reached the entrance to Little Blue John Canyon.
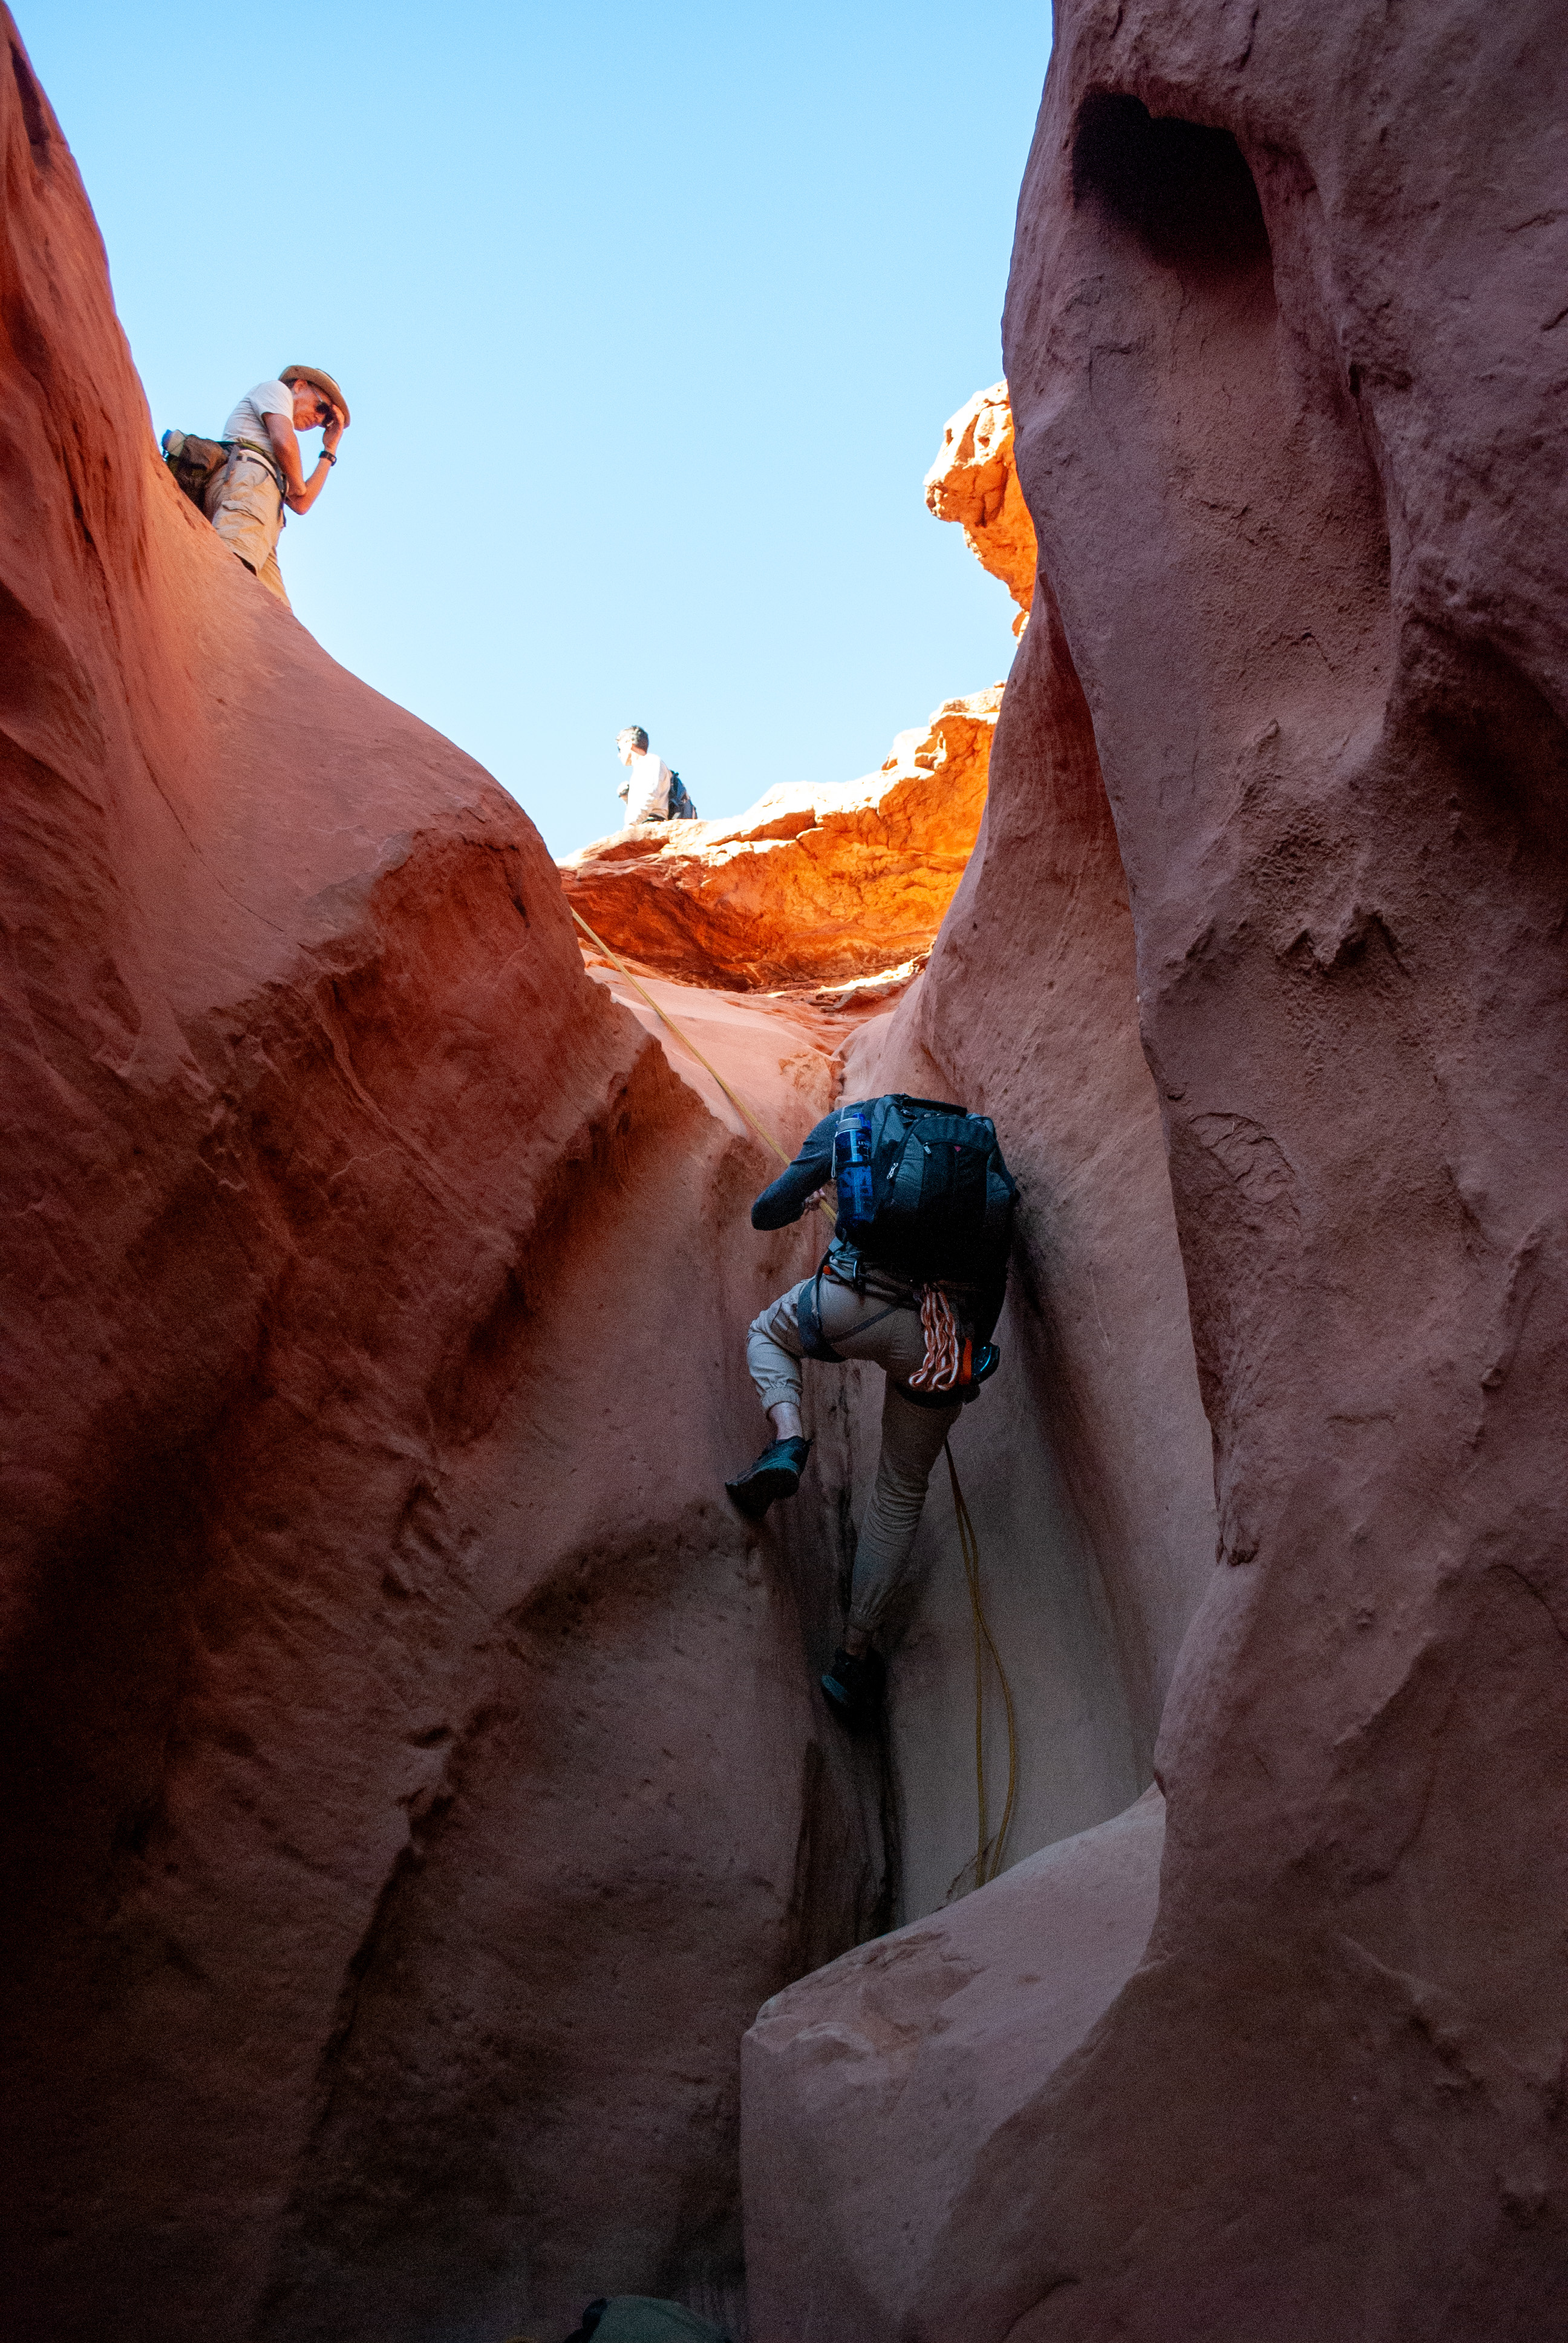
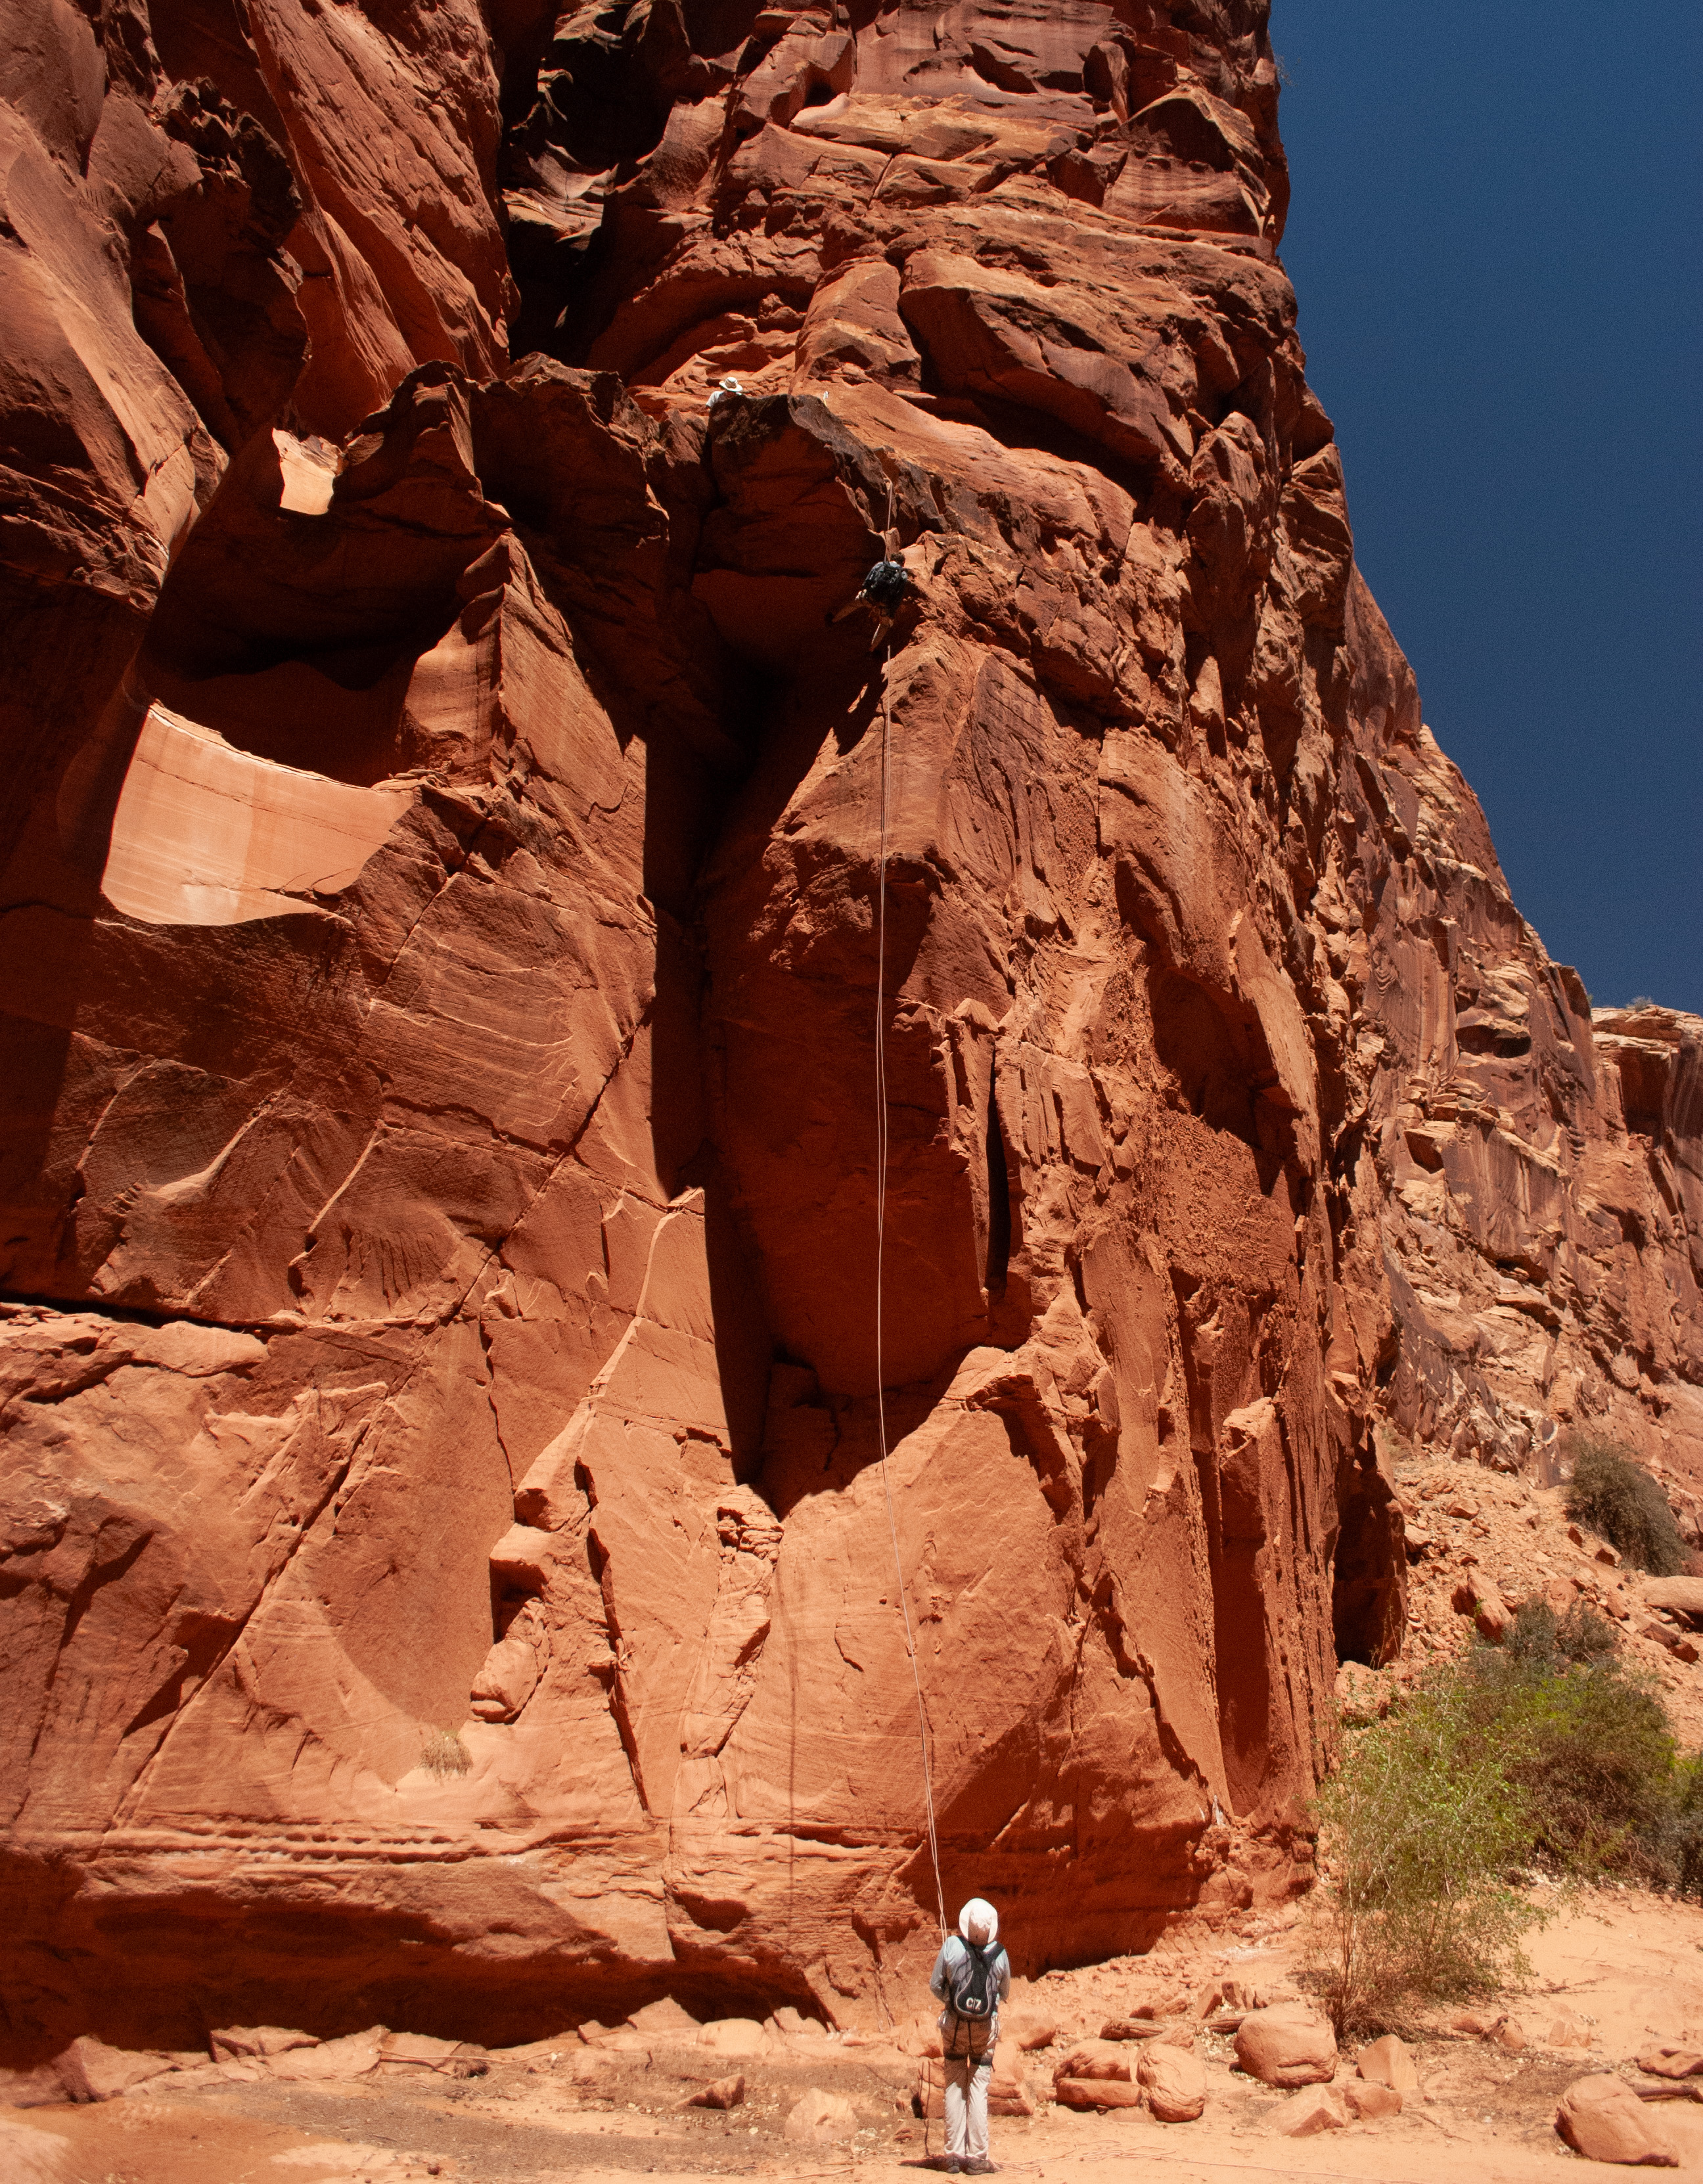
Little Blue John is a short but beautiful slot canyon that serves as the warm-up for the main event. It alternates between tight, narrow slots and wider, sandy washes.
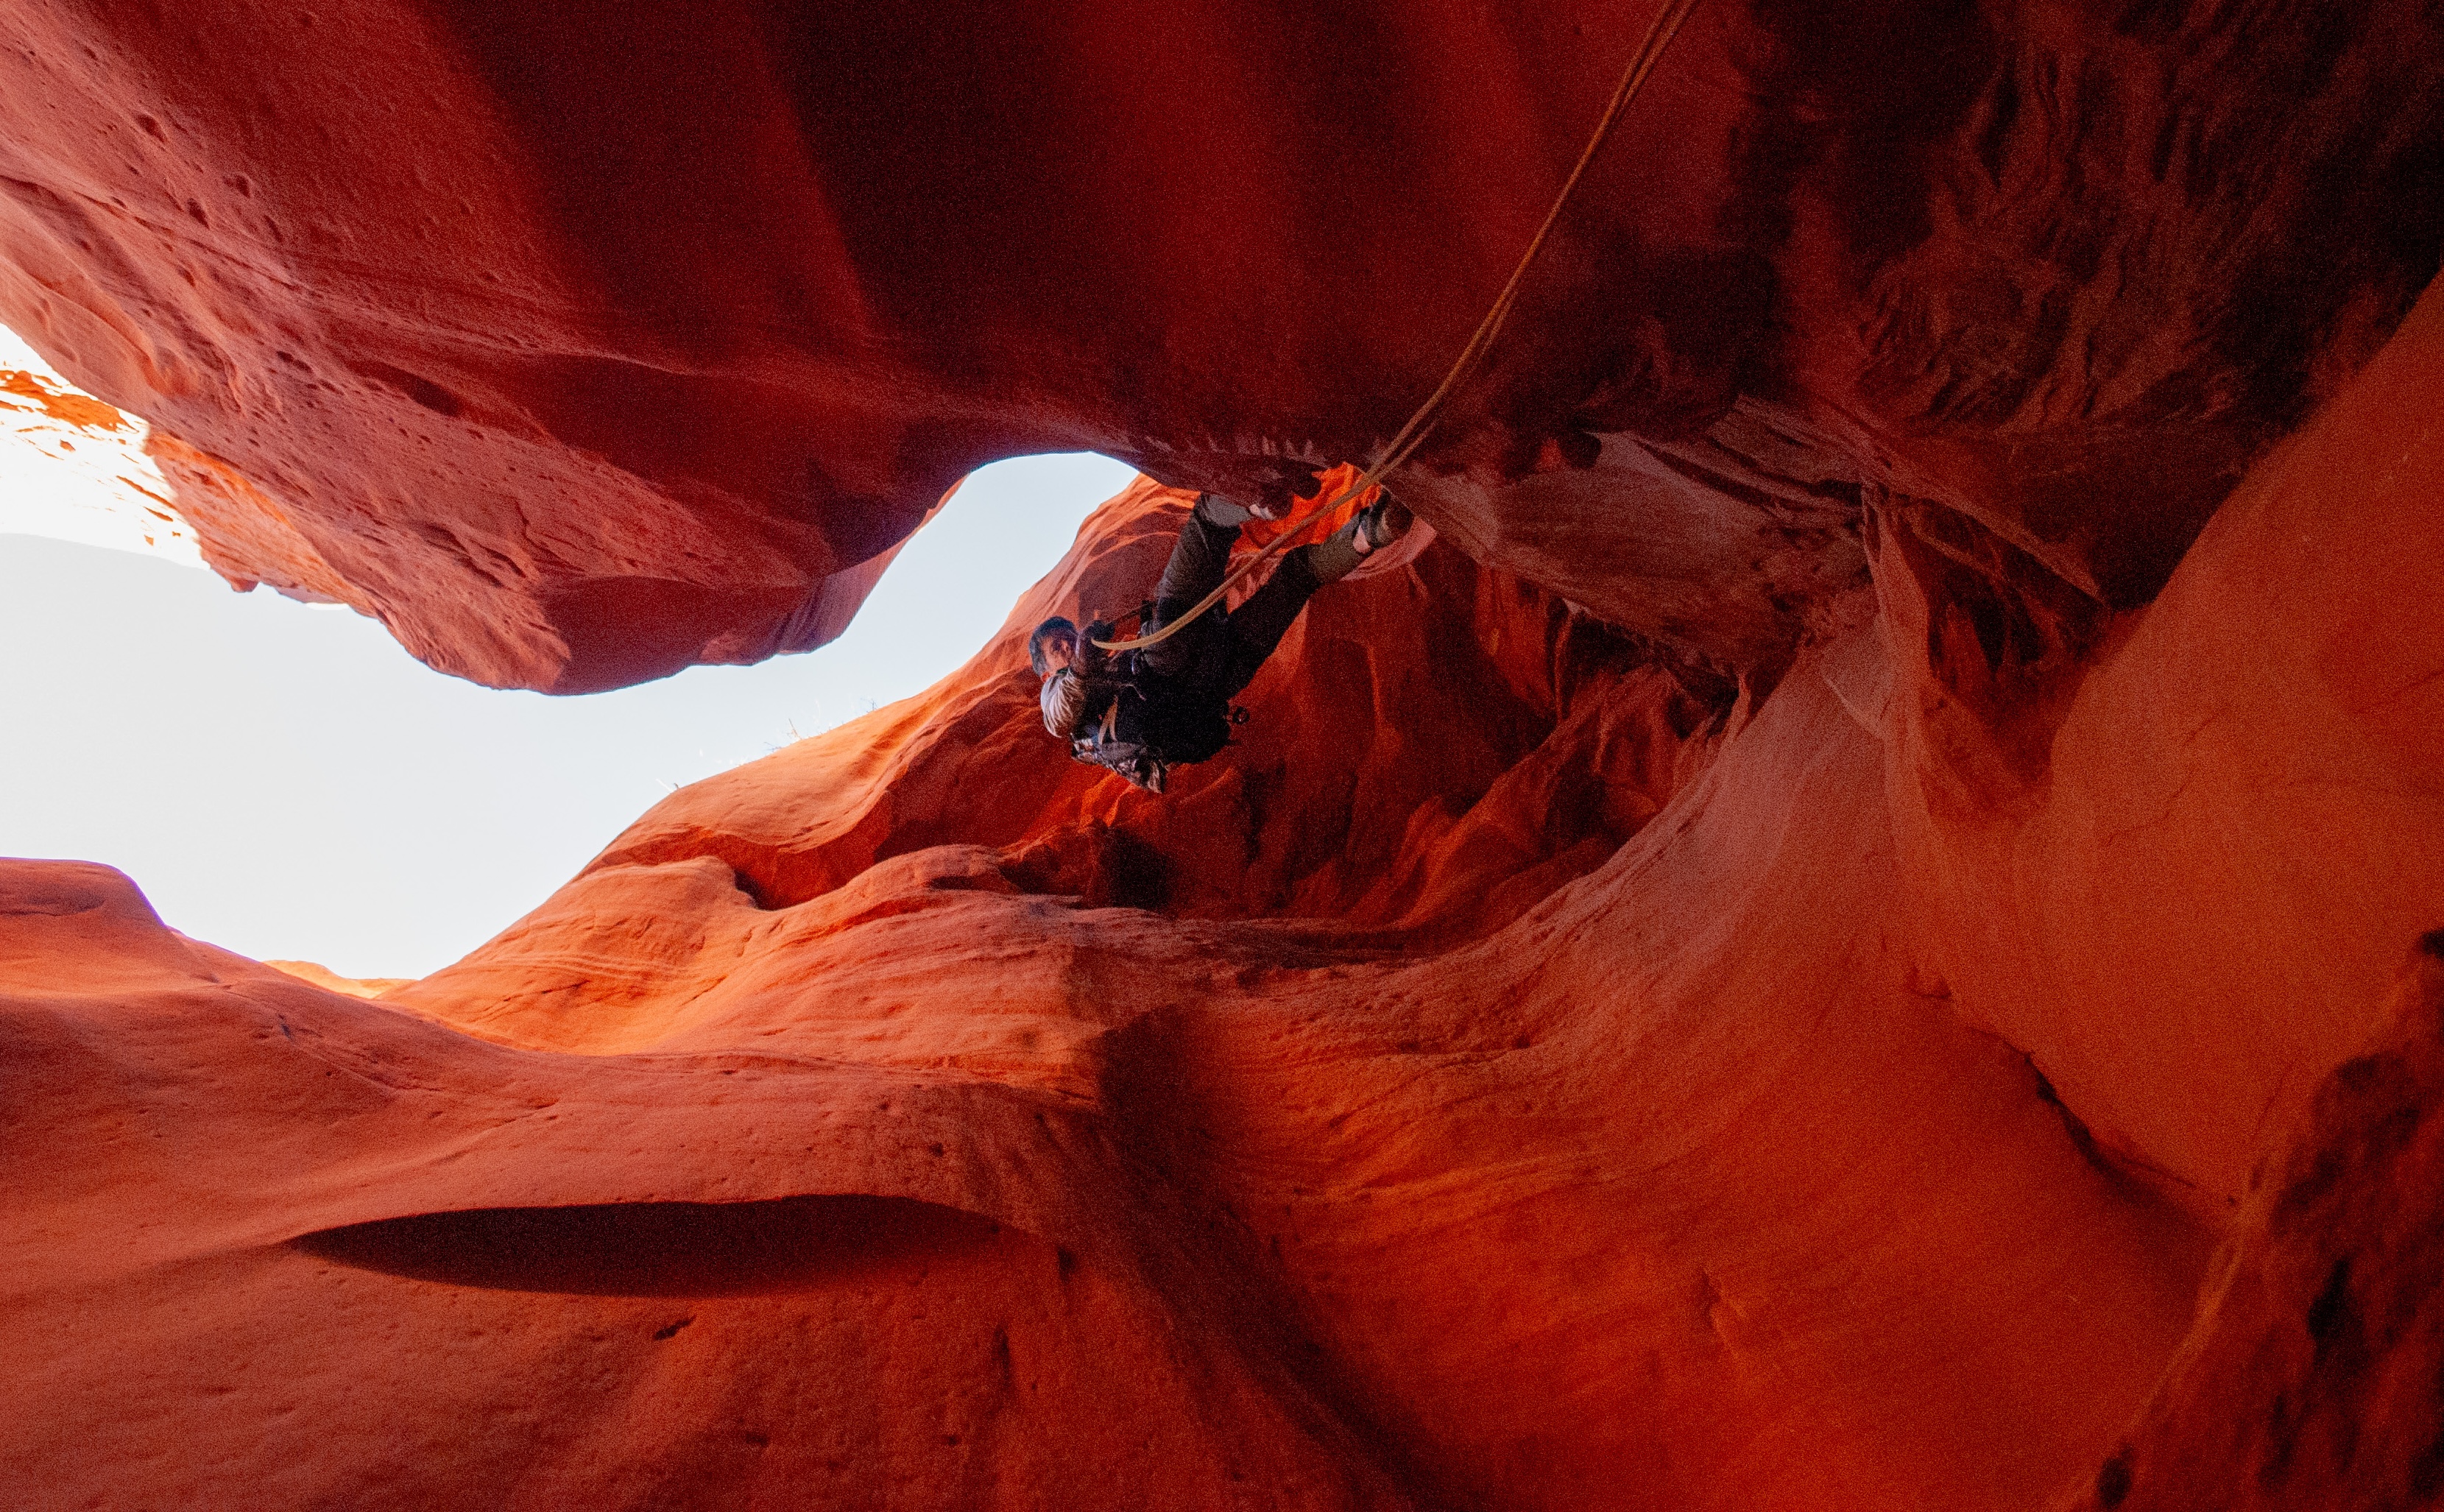
Early on, you encounter a 25-foot drop that can be downclimbed, but I recommend rappelling it. Soon after are two twisting 70-foot rappels — imagine descending through a narrow vertical tube.
These rappels were a ton of fun and a little tricky to navigate since the walls were so close together. I didn’t look graceful making my way down.
The light in this canyon is absolutely stunning. The deep slots feel alien and otherworldly, with twisting passages that are a blast to move through.
Main Blue John Canyon
I was having so much fun that I didn’t even notice when we crossed into Blue John Canyon. I'm a little fuzzy on when Little Blue John ended and Blue John began.
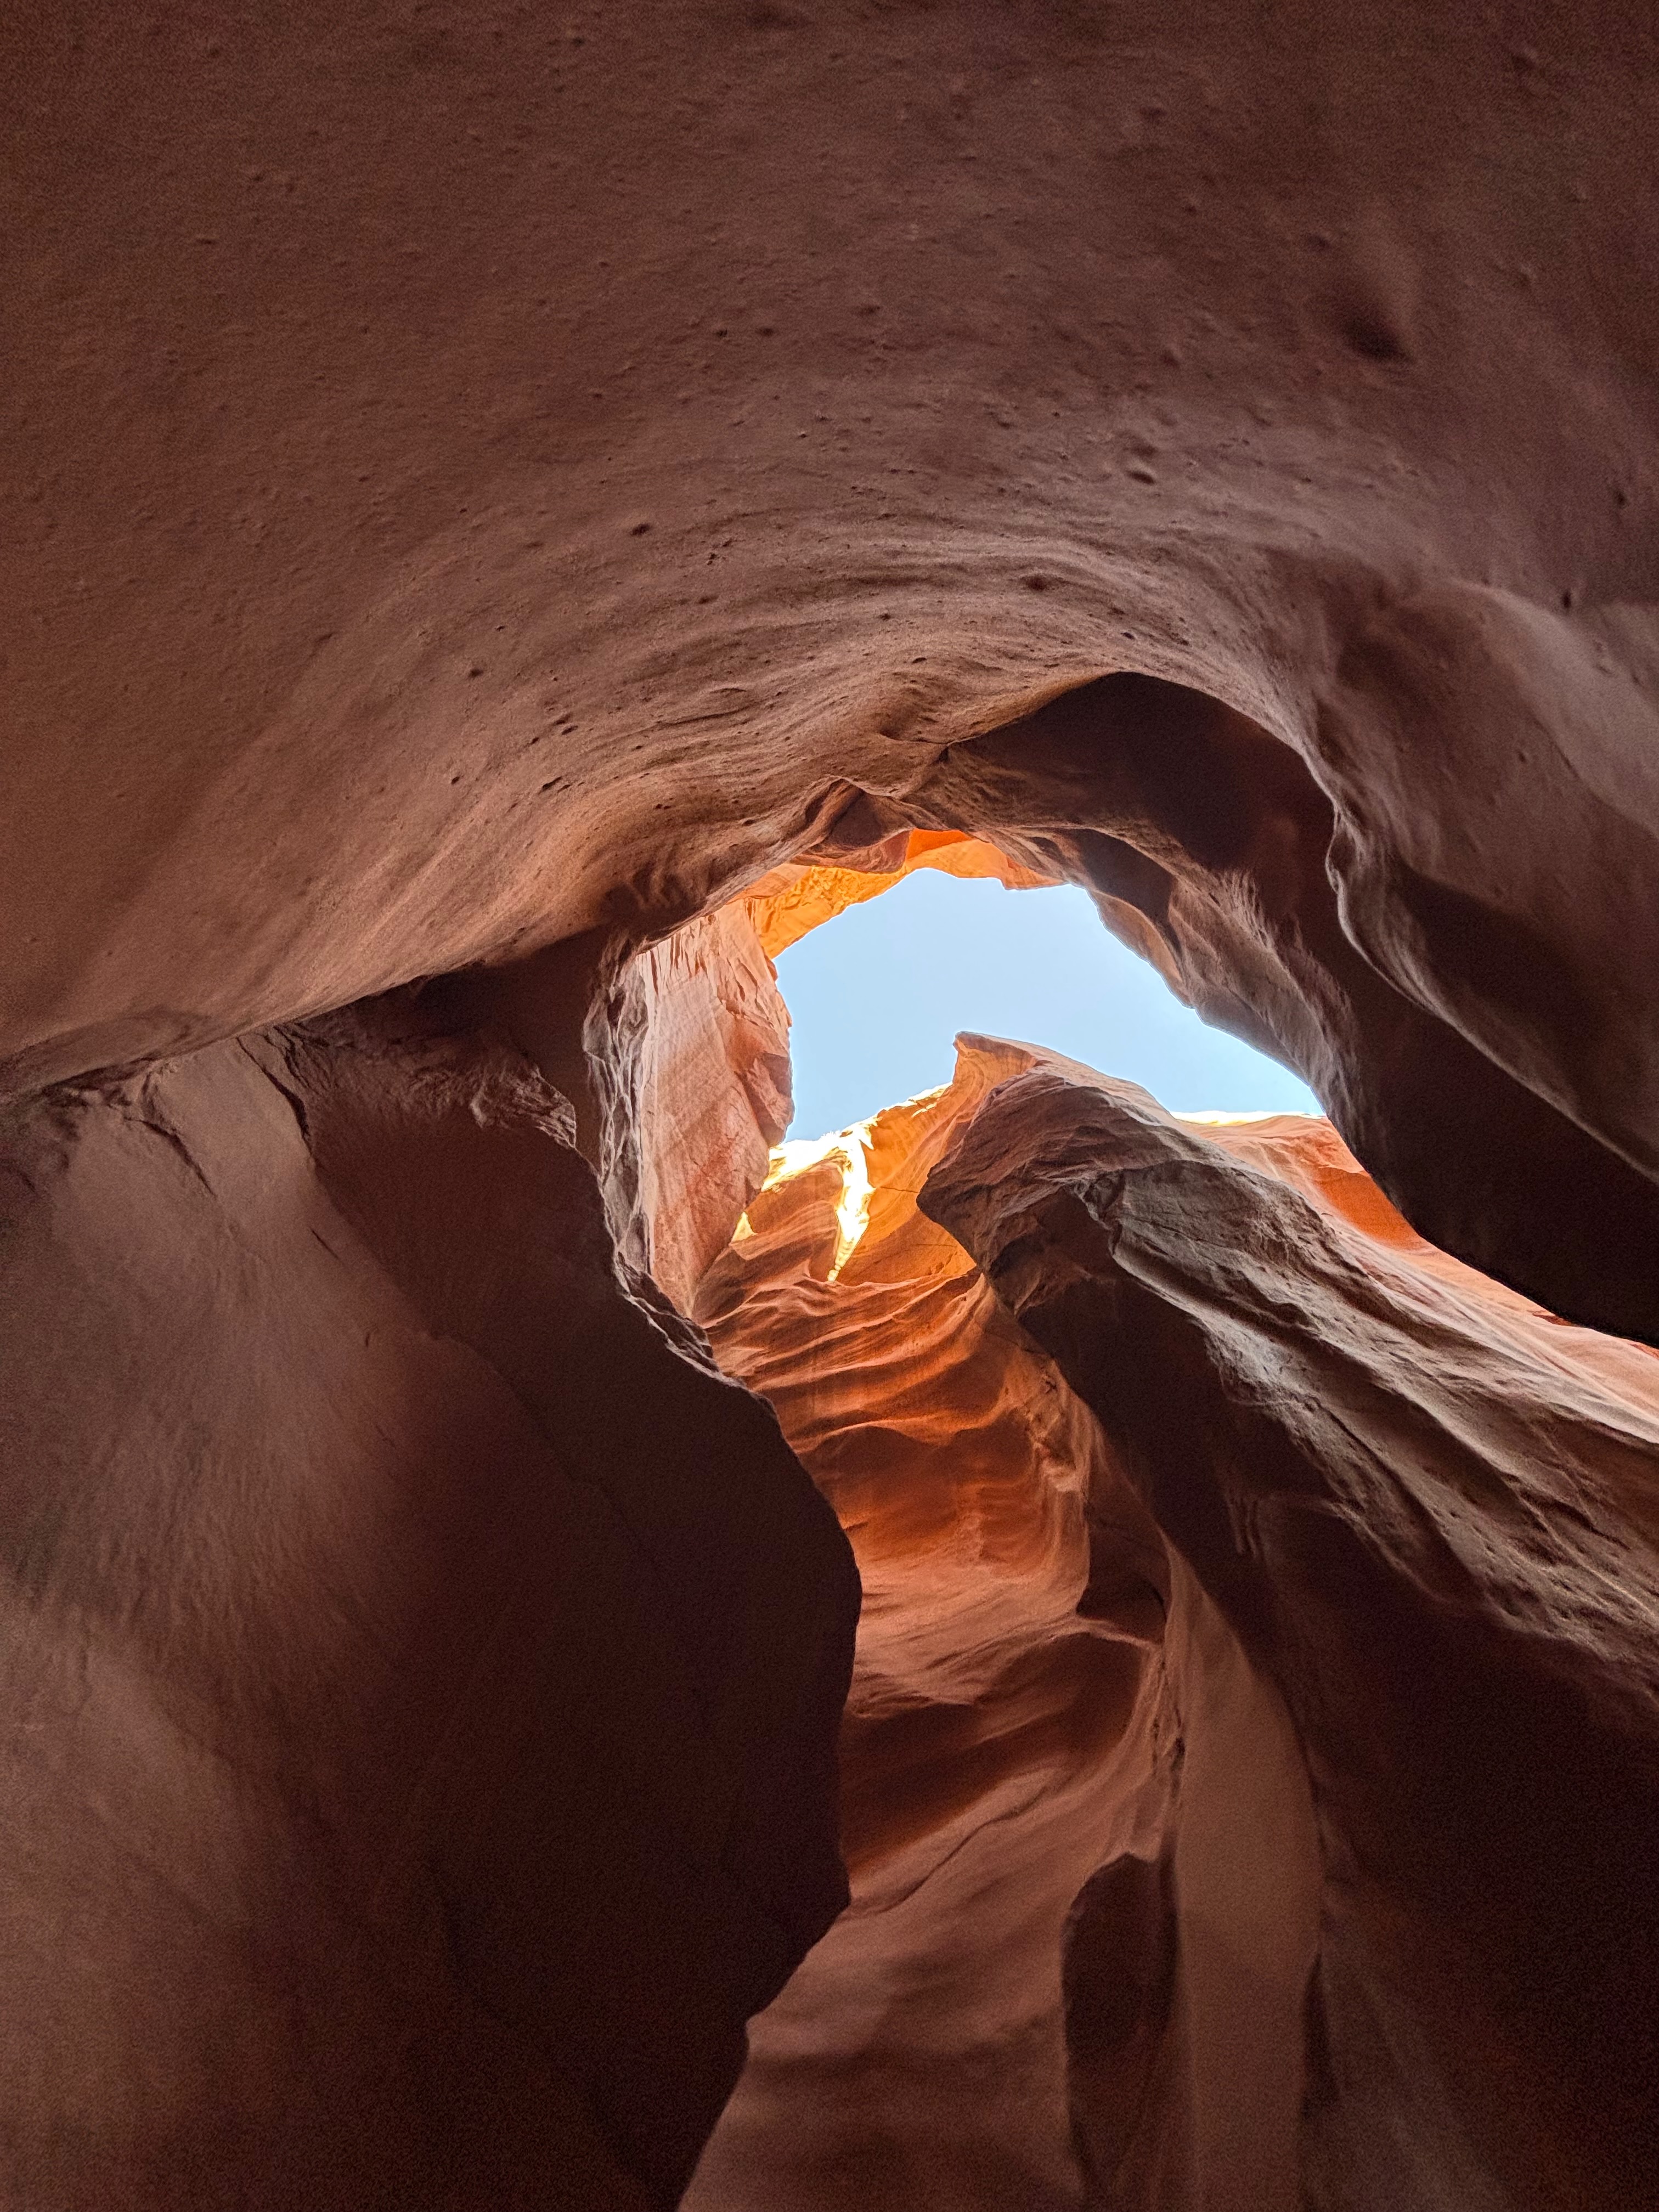
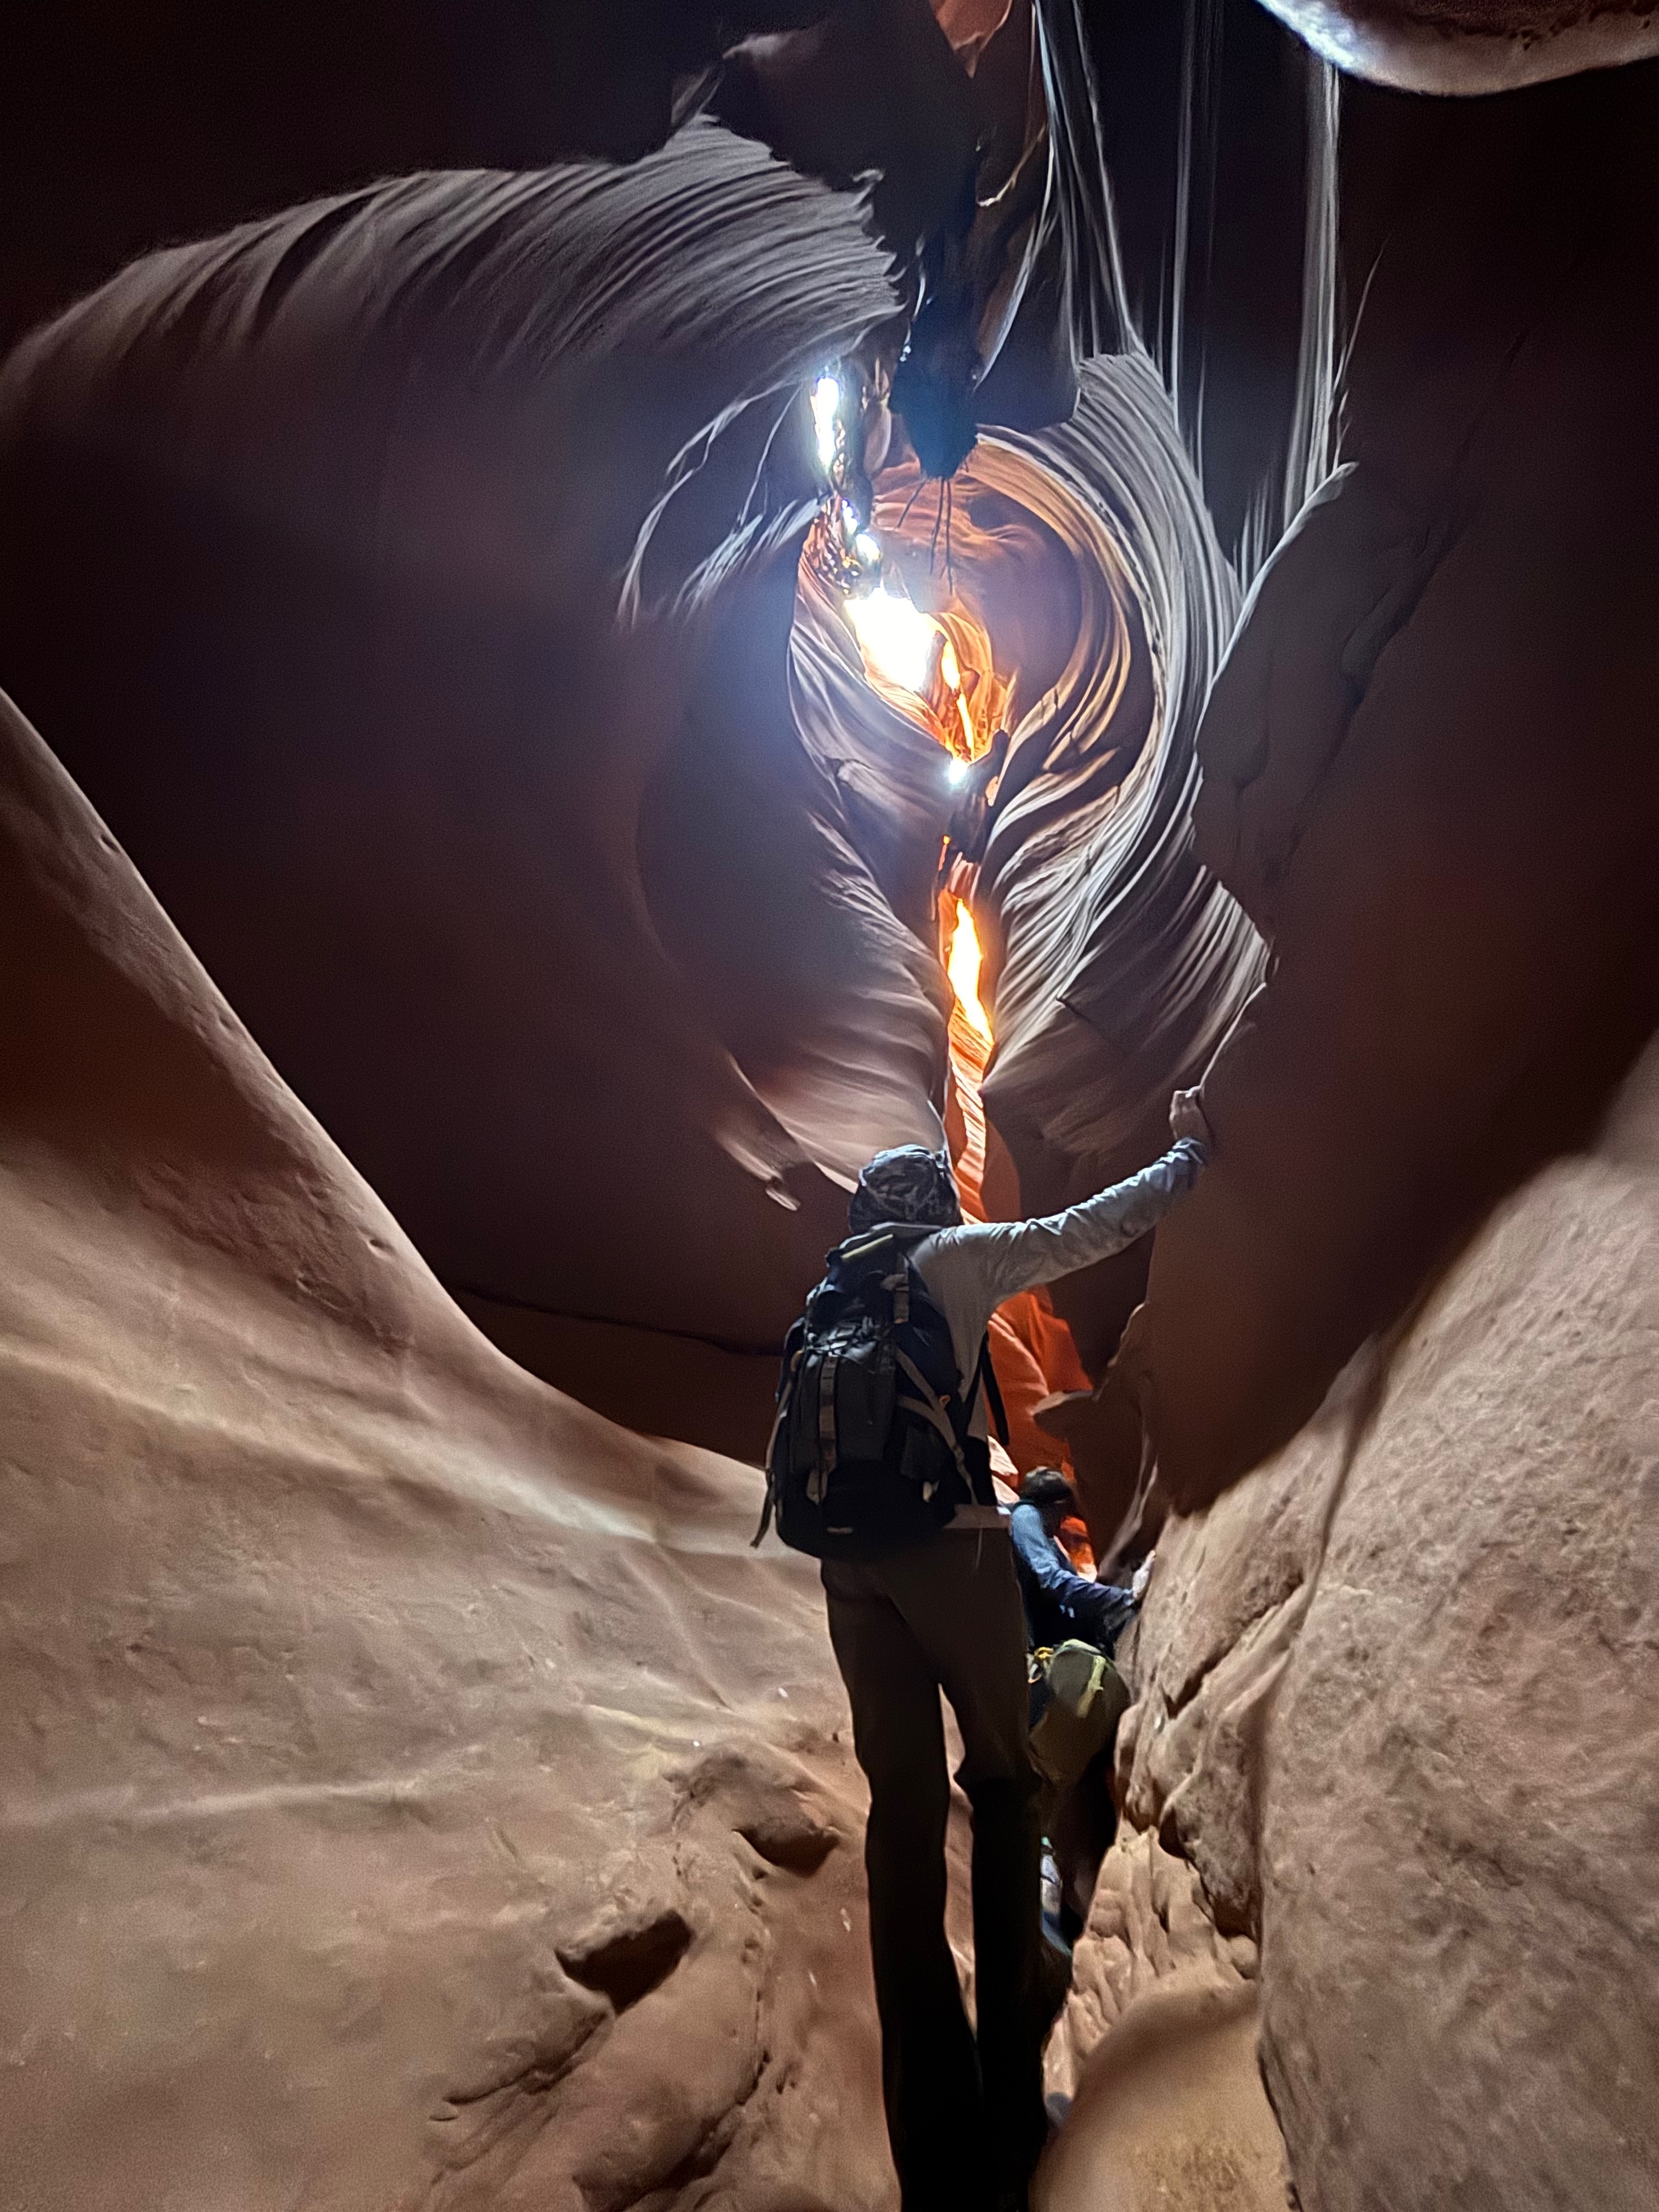
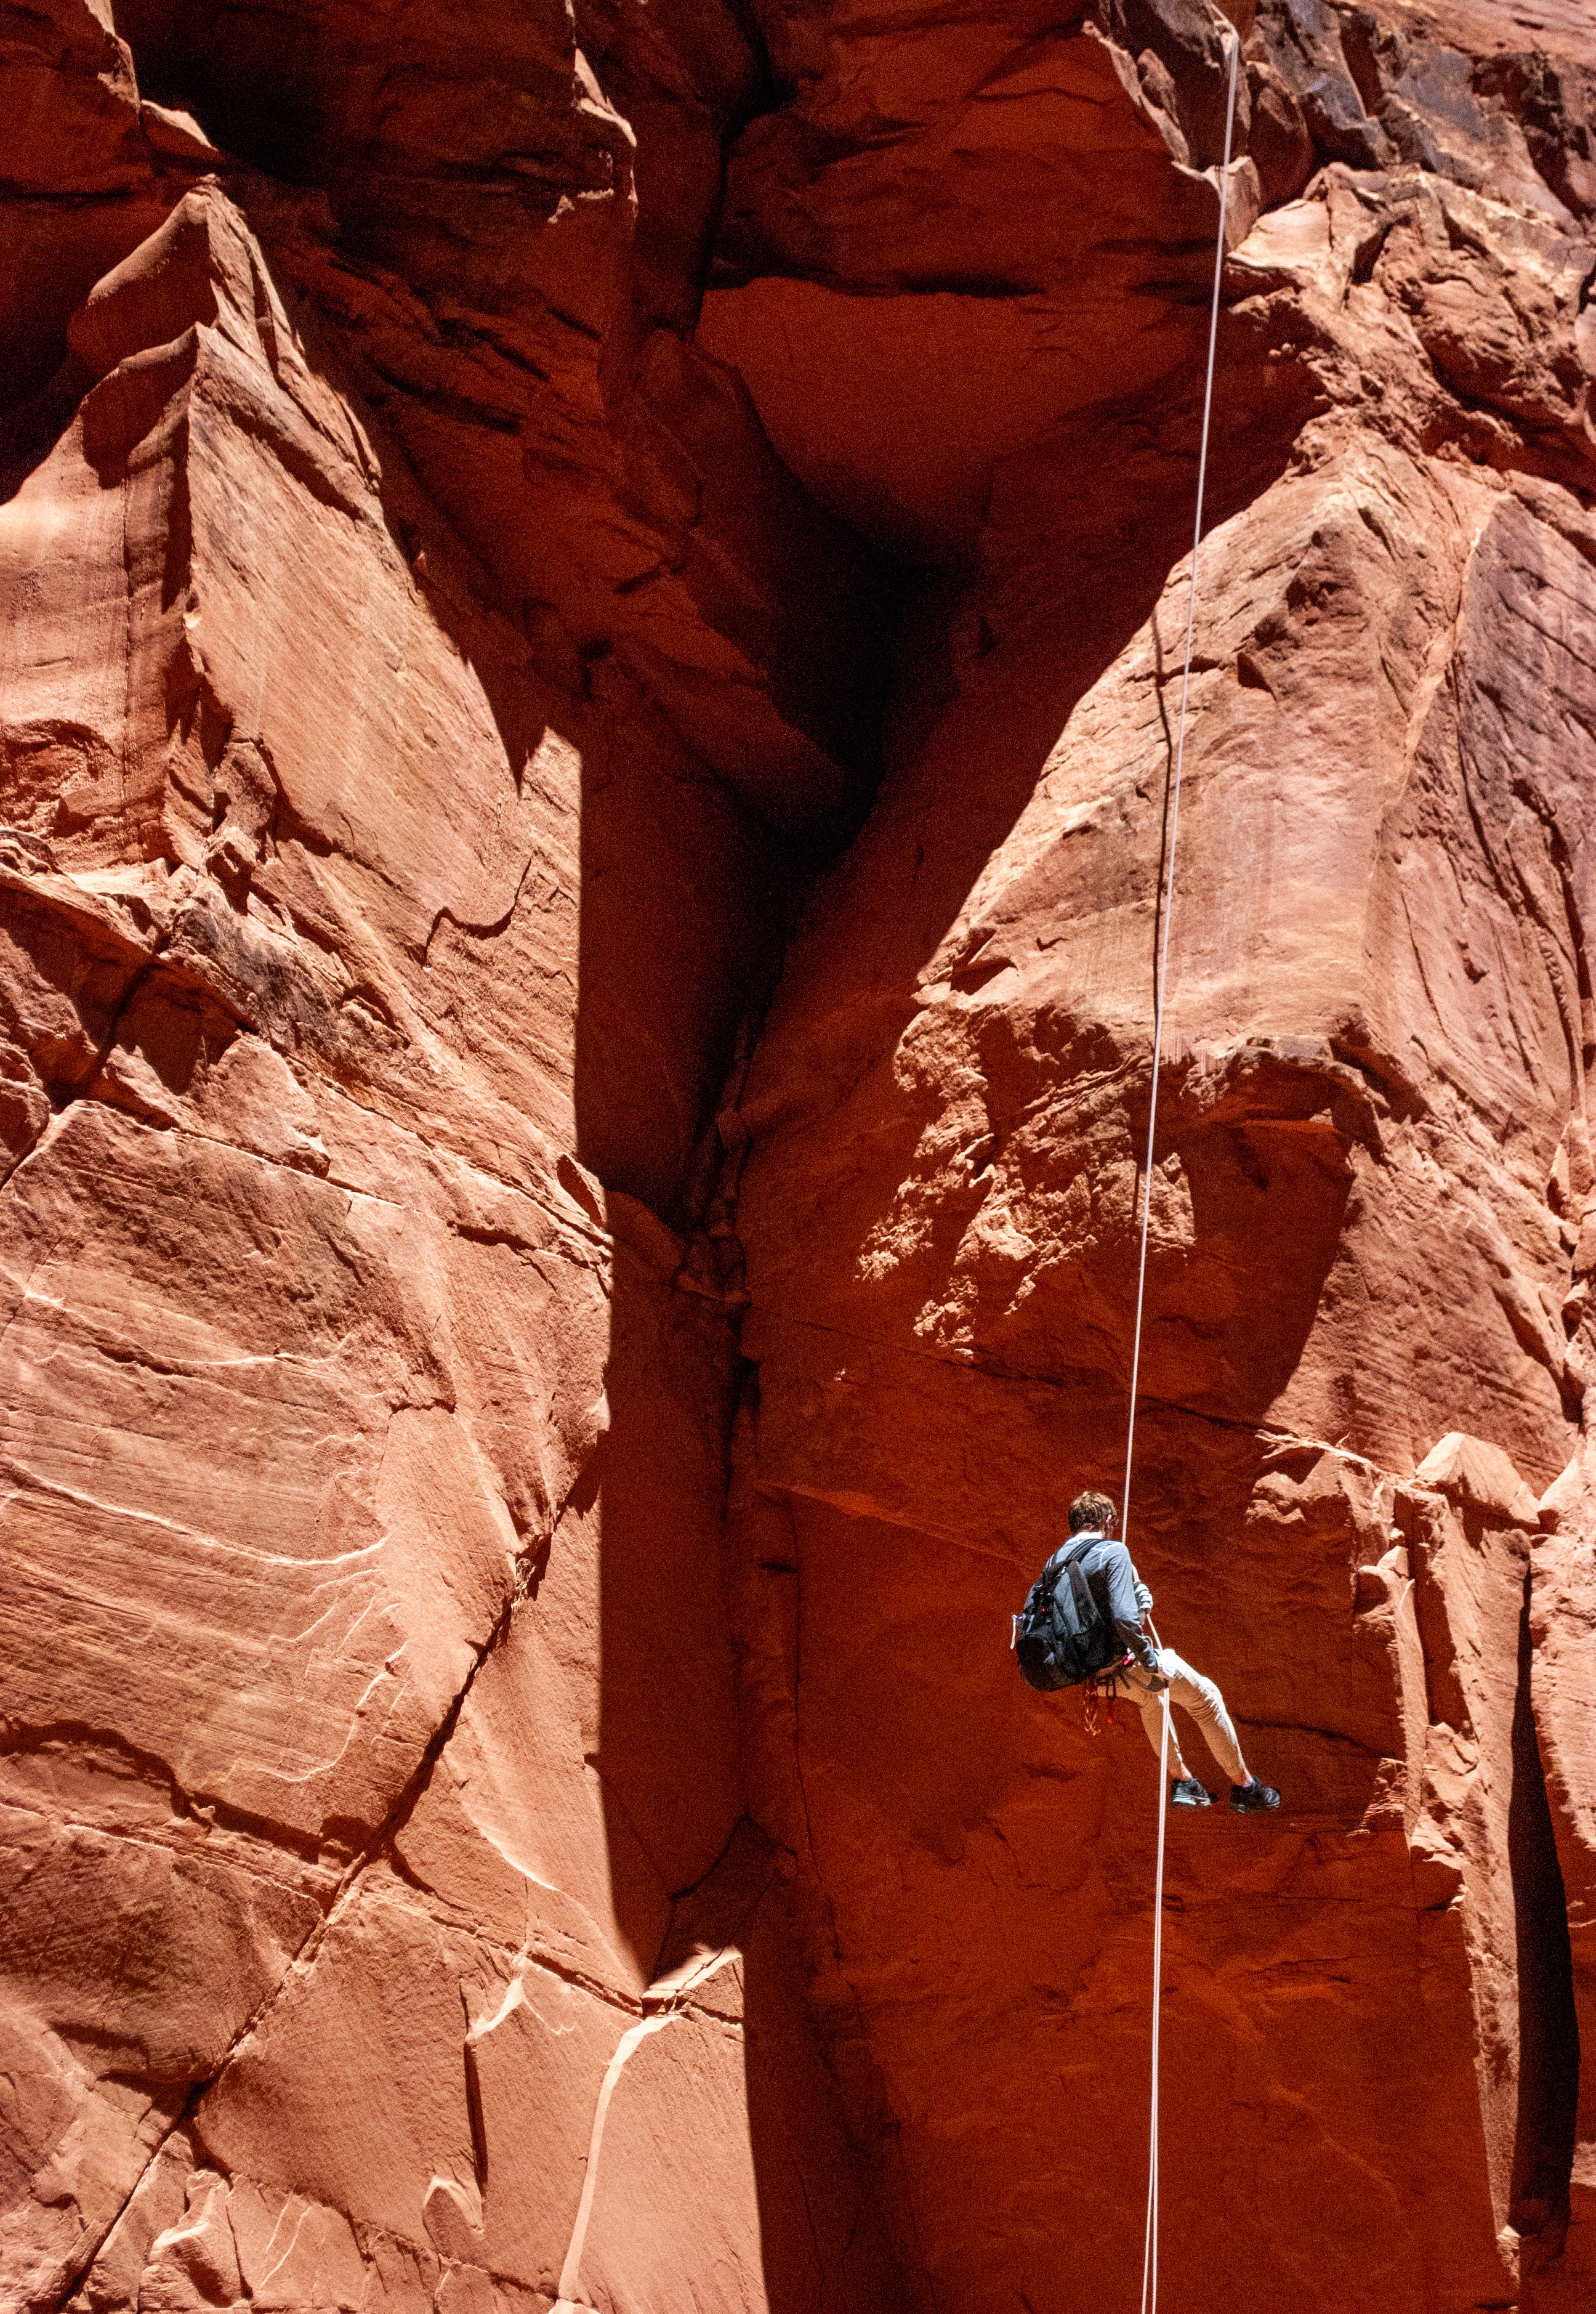
Main Blue John Canyon was incredible. It started out wider but quickly narrowed into a stunning slot. The slot became much deeper and tighter than anything we encountered in Little Blue John.
At one point, it got so deep that it was hard to see. Having a light wasn’t absolutely necessary, but it was helpful.
This is where we encountered our only pool of water. Luckily, it was possible to brace our backs against one wall and feet against the other to shimmy over it. I was relieved to keep my feet dry with so much hiking still ahead.
Somewhere in this section—though I didn’t notice the exact spot—is where Aron Ralston got stuck in 2003. Seeing it firsthand, I can understand just how terrifying that situation would have been.
It’s a remote, rarely trafficked canyon. The odds of someone stumbling upon you are slim. That’s why I’d never do this canyon solo.
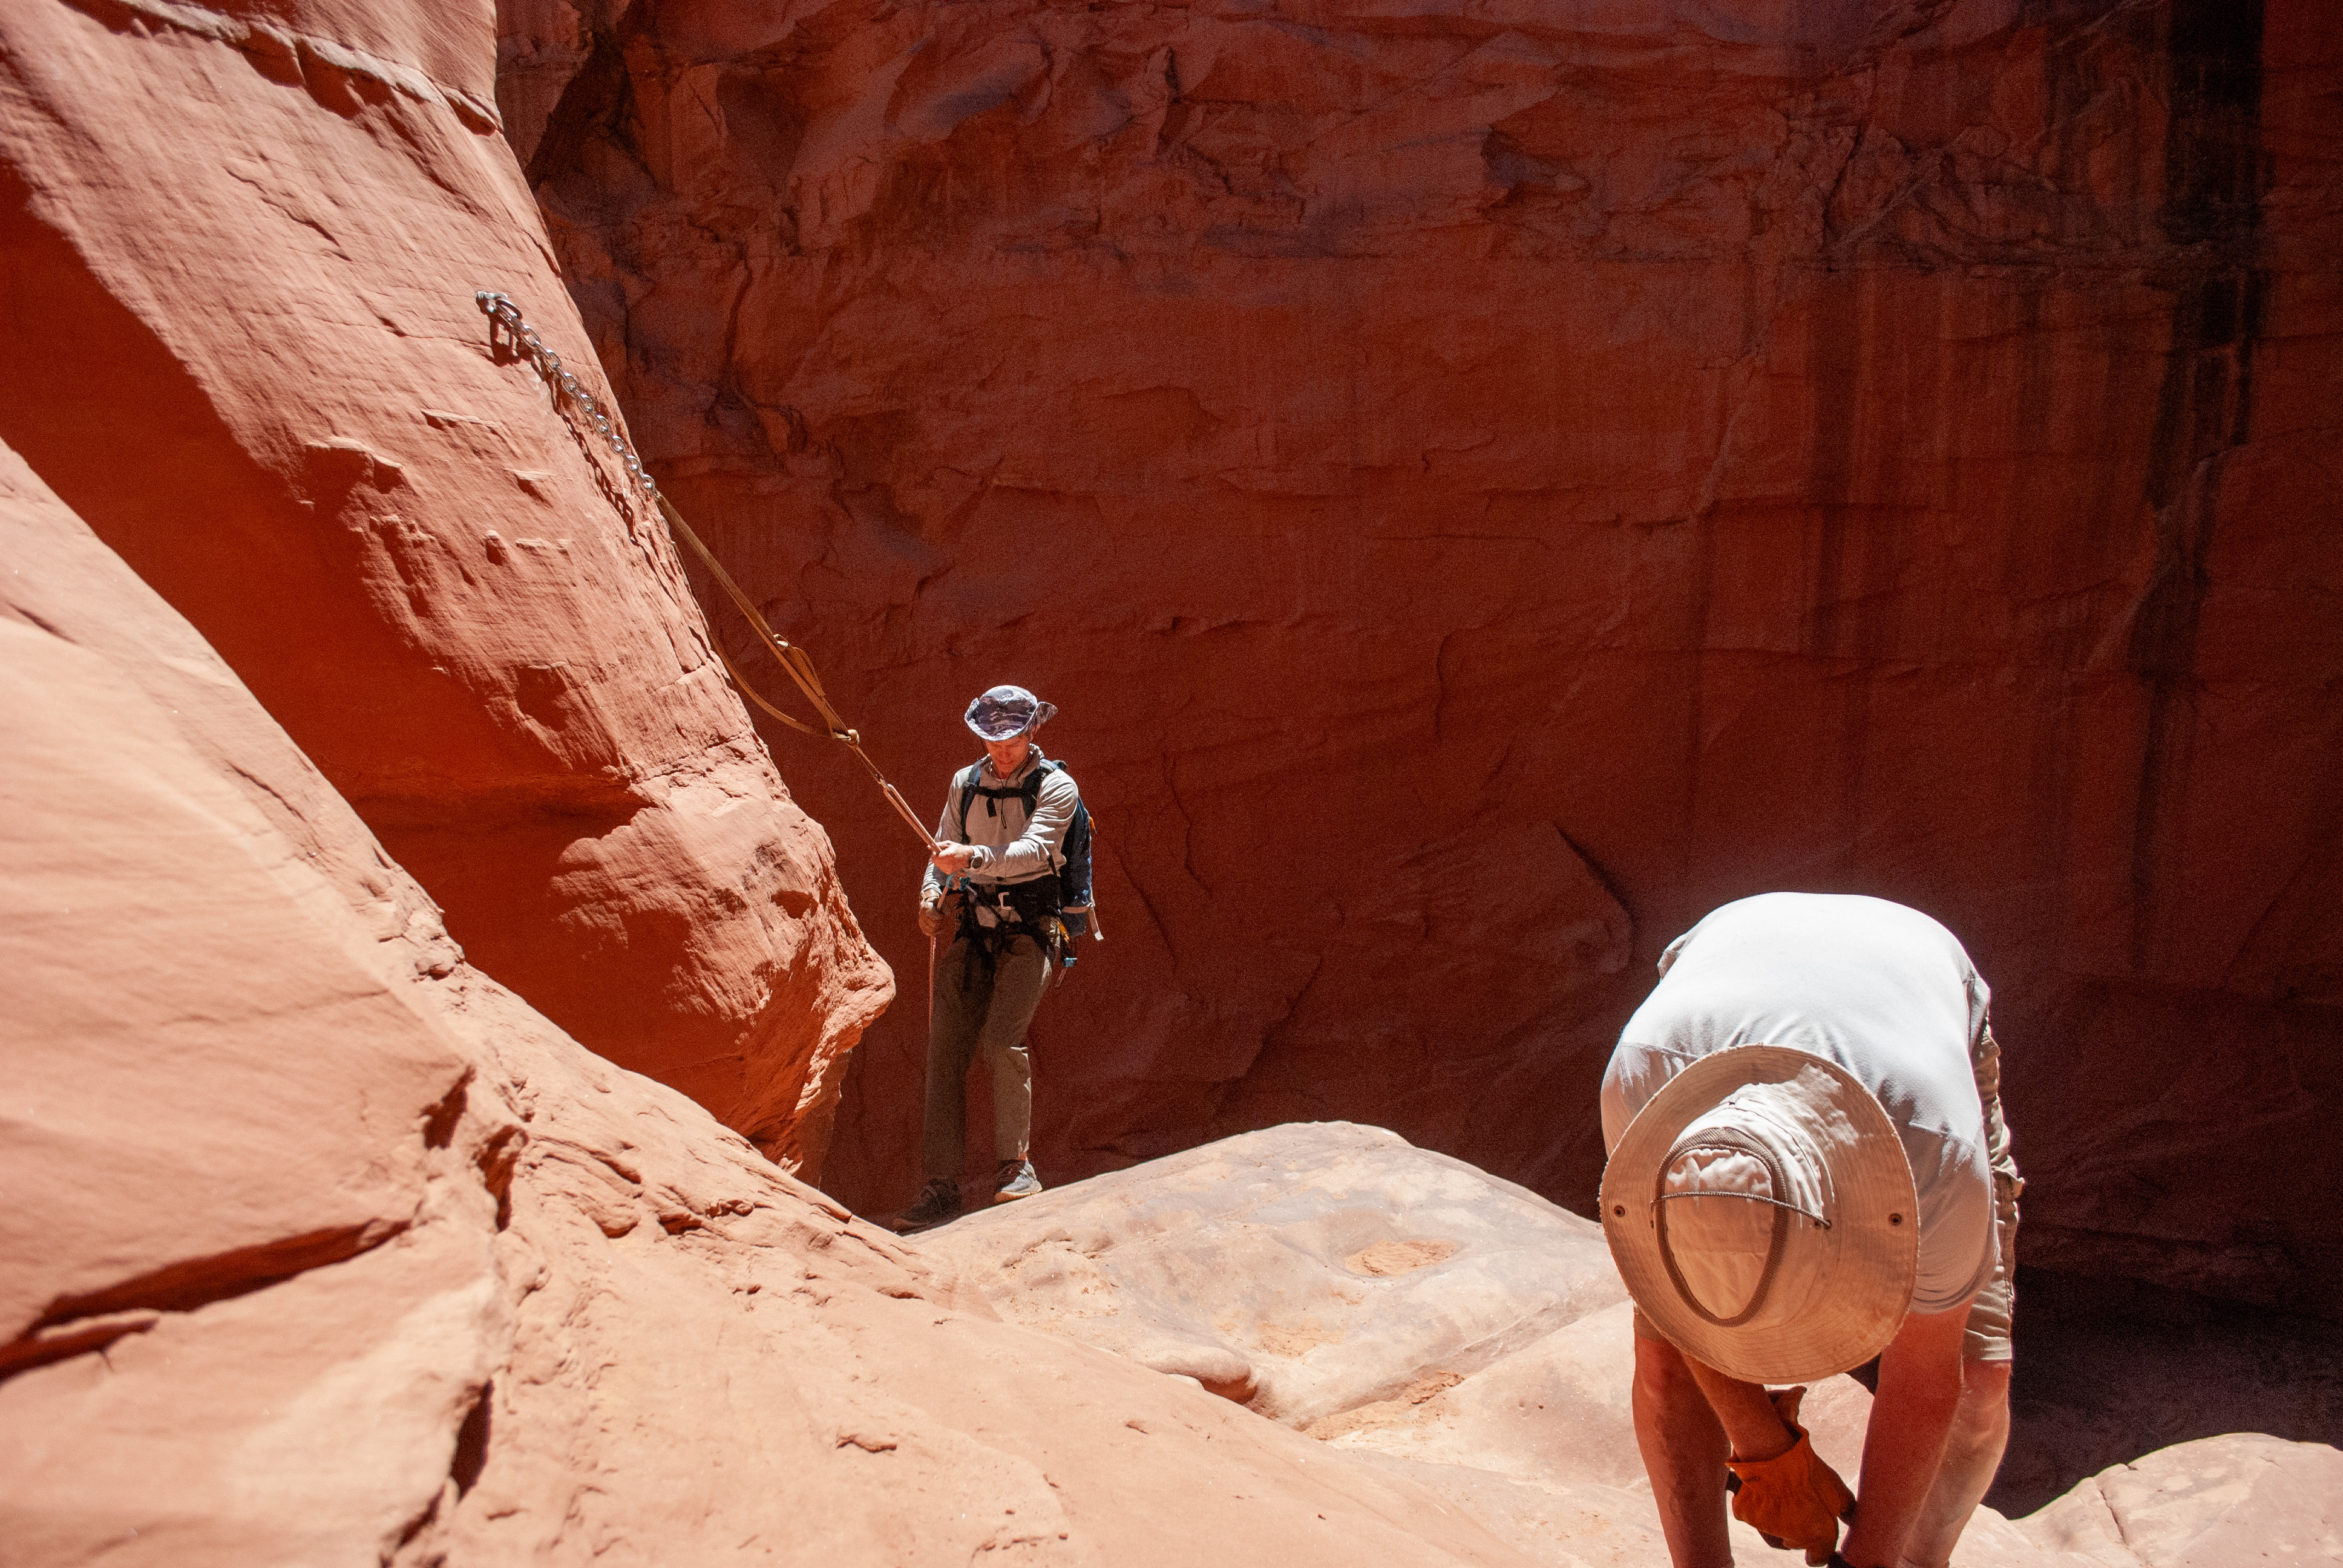
Soon we reached my favorite part of the entire trip. The narrow canyon opened up to a natural platform with a massive drop-off into the much larger Horseshoe Canyon.
As I stepped onto the platform, I noticed bolts on the left—our setup point for the 70-foot rappel. All the previous rappels had been short or within narrow walls, but now I stood on an exposed ledge, and my fear of heights kicked in.
We took turns rappelling down. When it was my turn, I clipped in and backed off the ledge. My feet stayed on the wall for the first quarter, but then the overhang transitioned into open air.
Despite my fear of heights, this rappel was so much fun. It felt like flying as I smoothly descended until my feet hit the sandy wash below.
Eventually, everyone made it down, and we pulled the rope through. I wasn’t ready for what came next.
Horseshoe Canyon and Exit
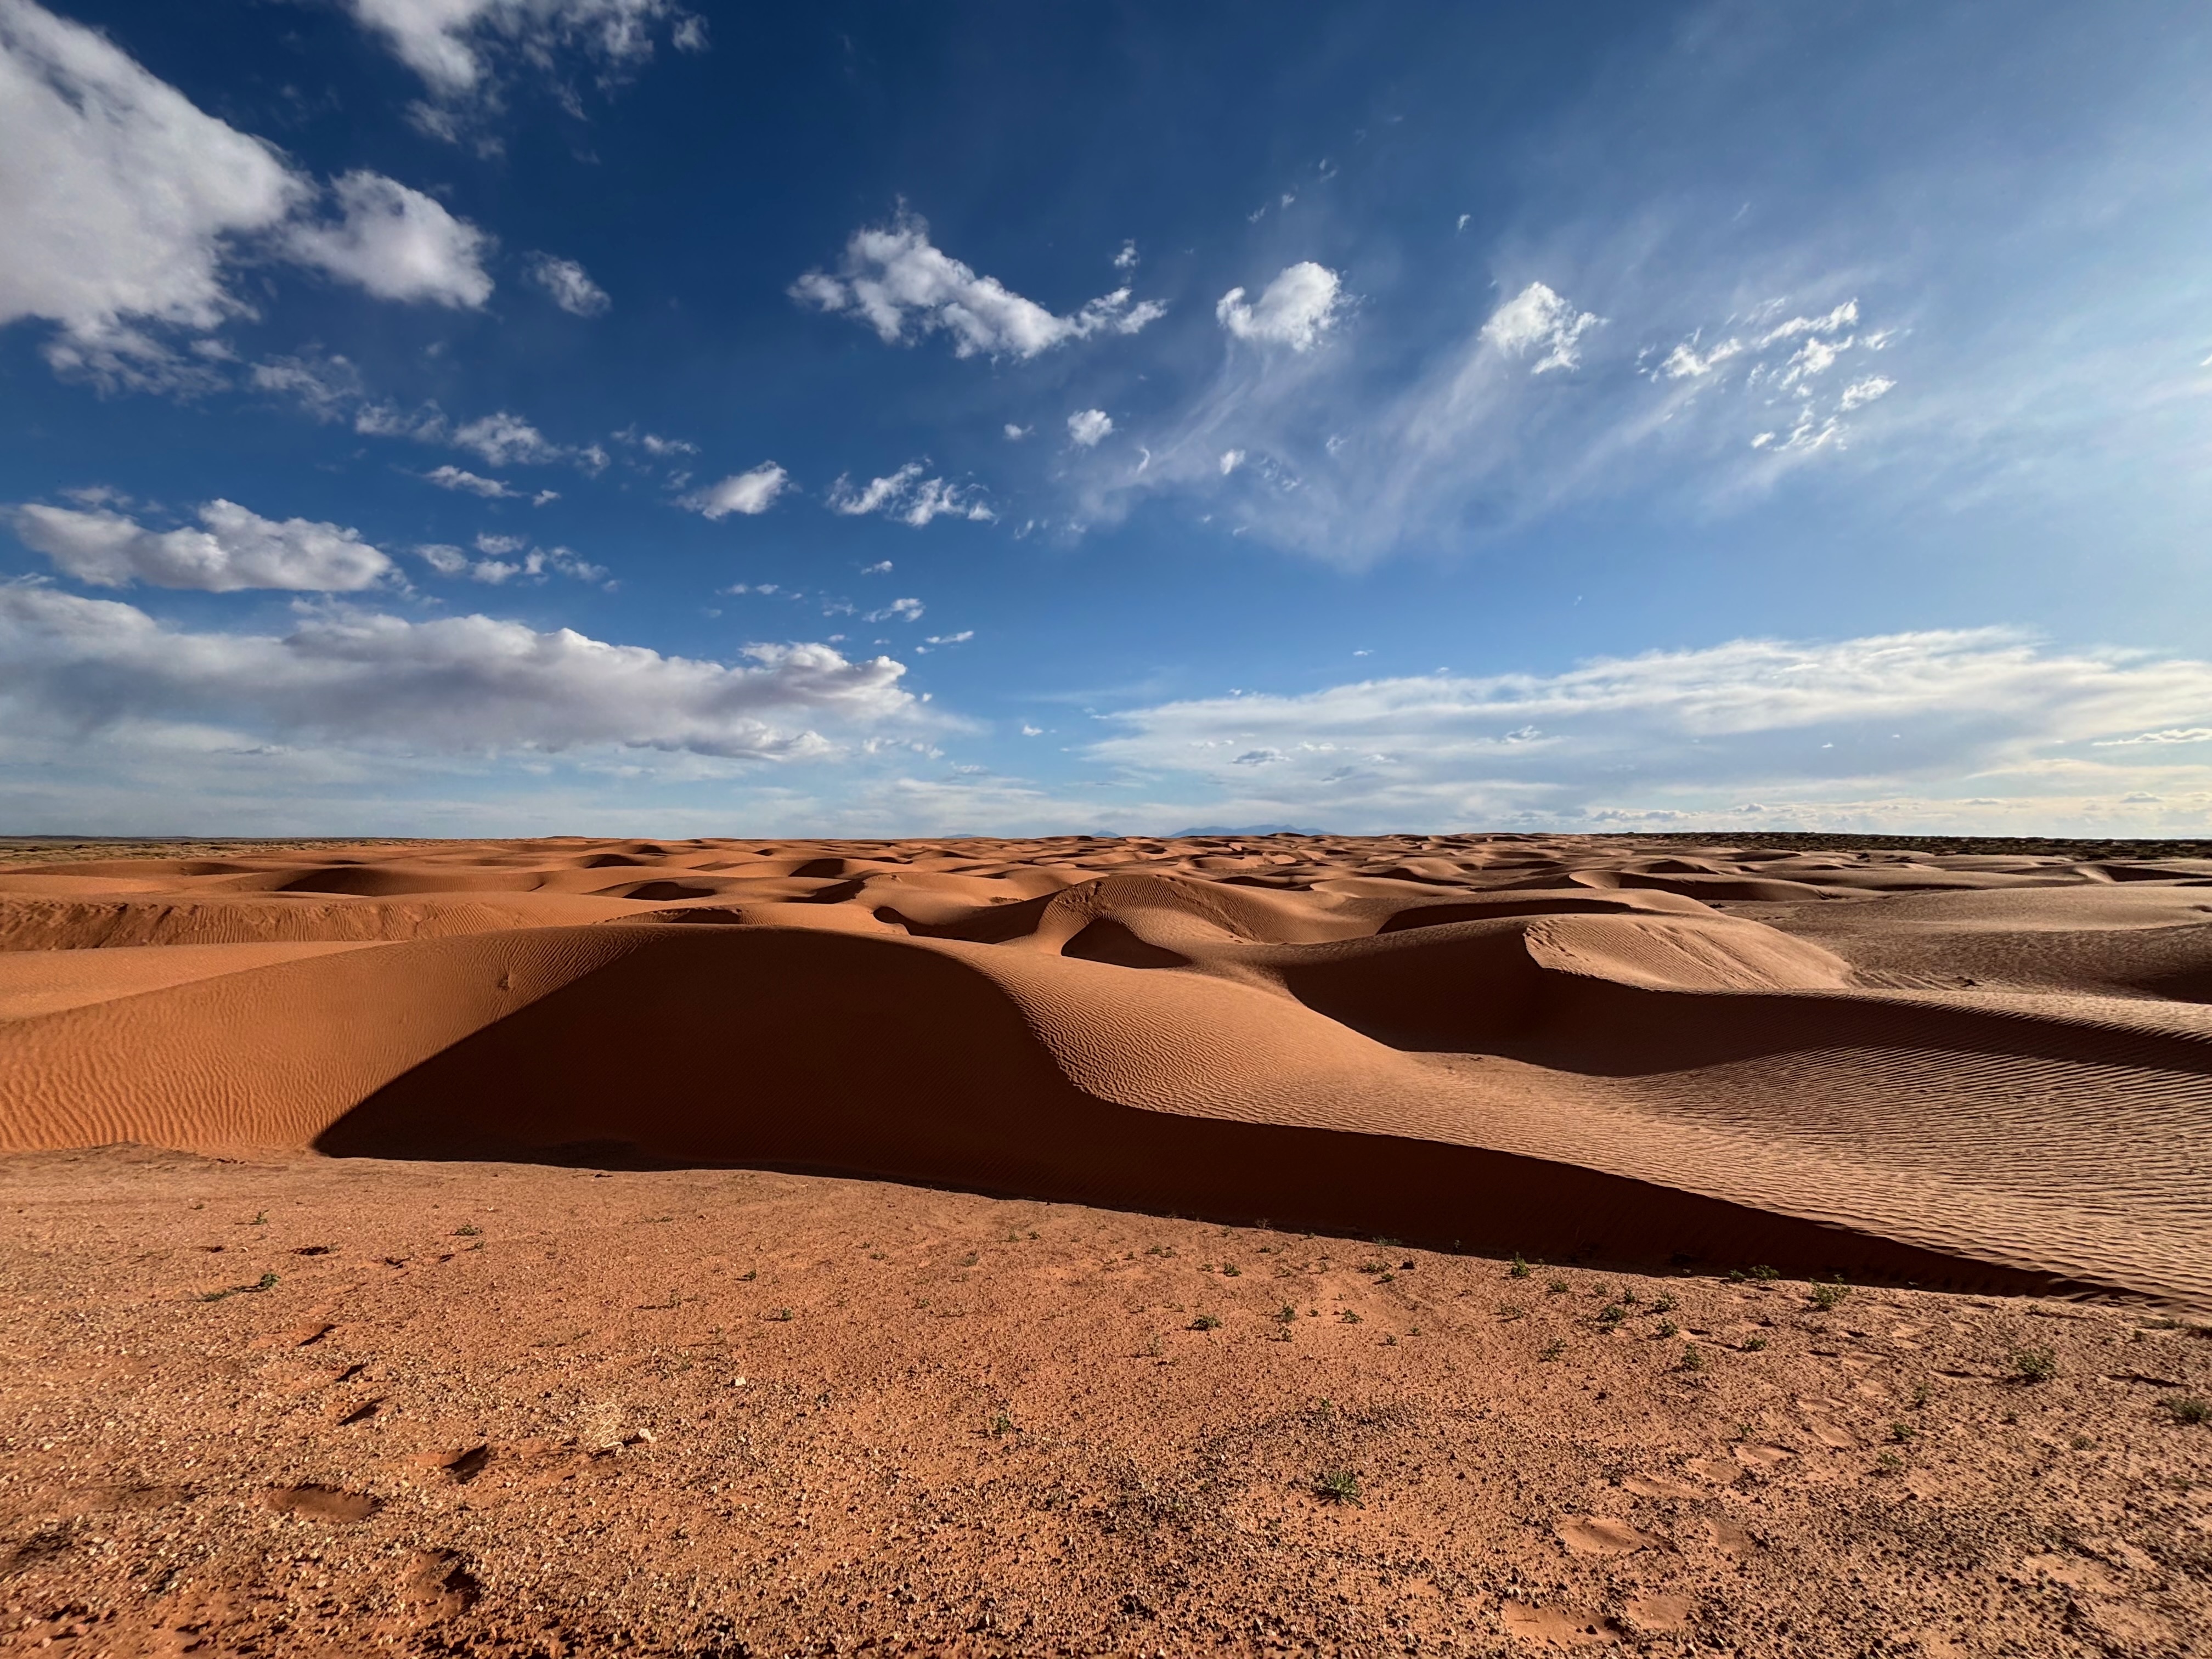
After the final rappel, I had no idea the hardest part of the trip was still ahead. And by hard, I don’t mean exciting or technical — I mean grueling. We had about an 8-mile death march waiting for us.
Horseshoe Canyon is a wide, sandy wash with almost no shade and no water. The sand makes every step feel like five. And since you can’t start this canyon too early — you don’t want to be in the slots in the dark — you almost always end up hitting this stretch during the hottest part of the day.
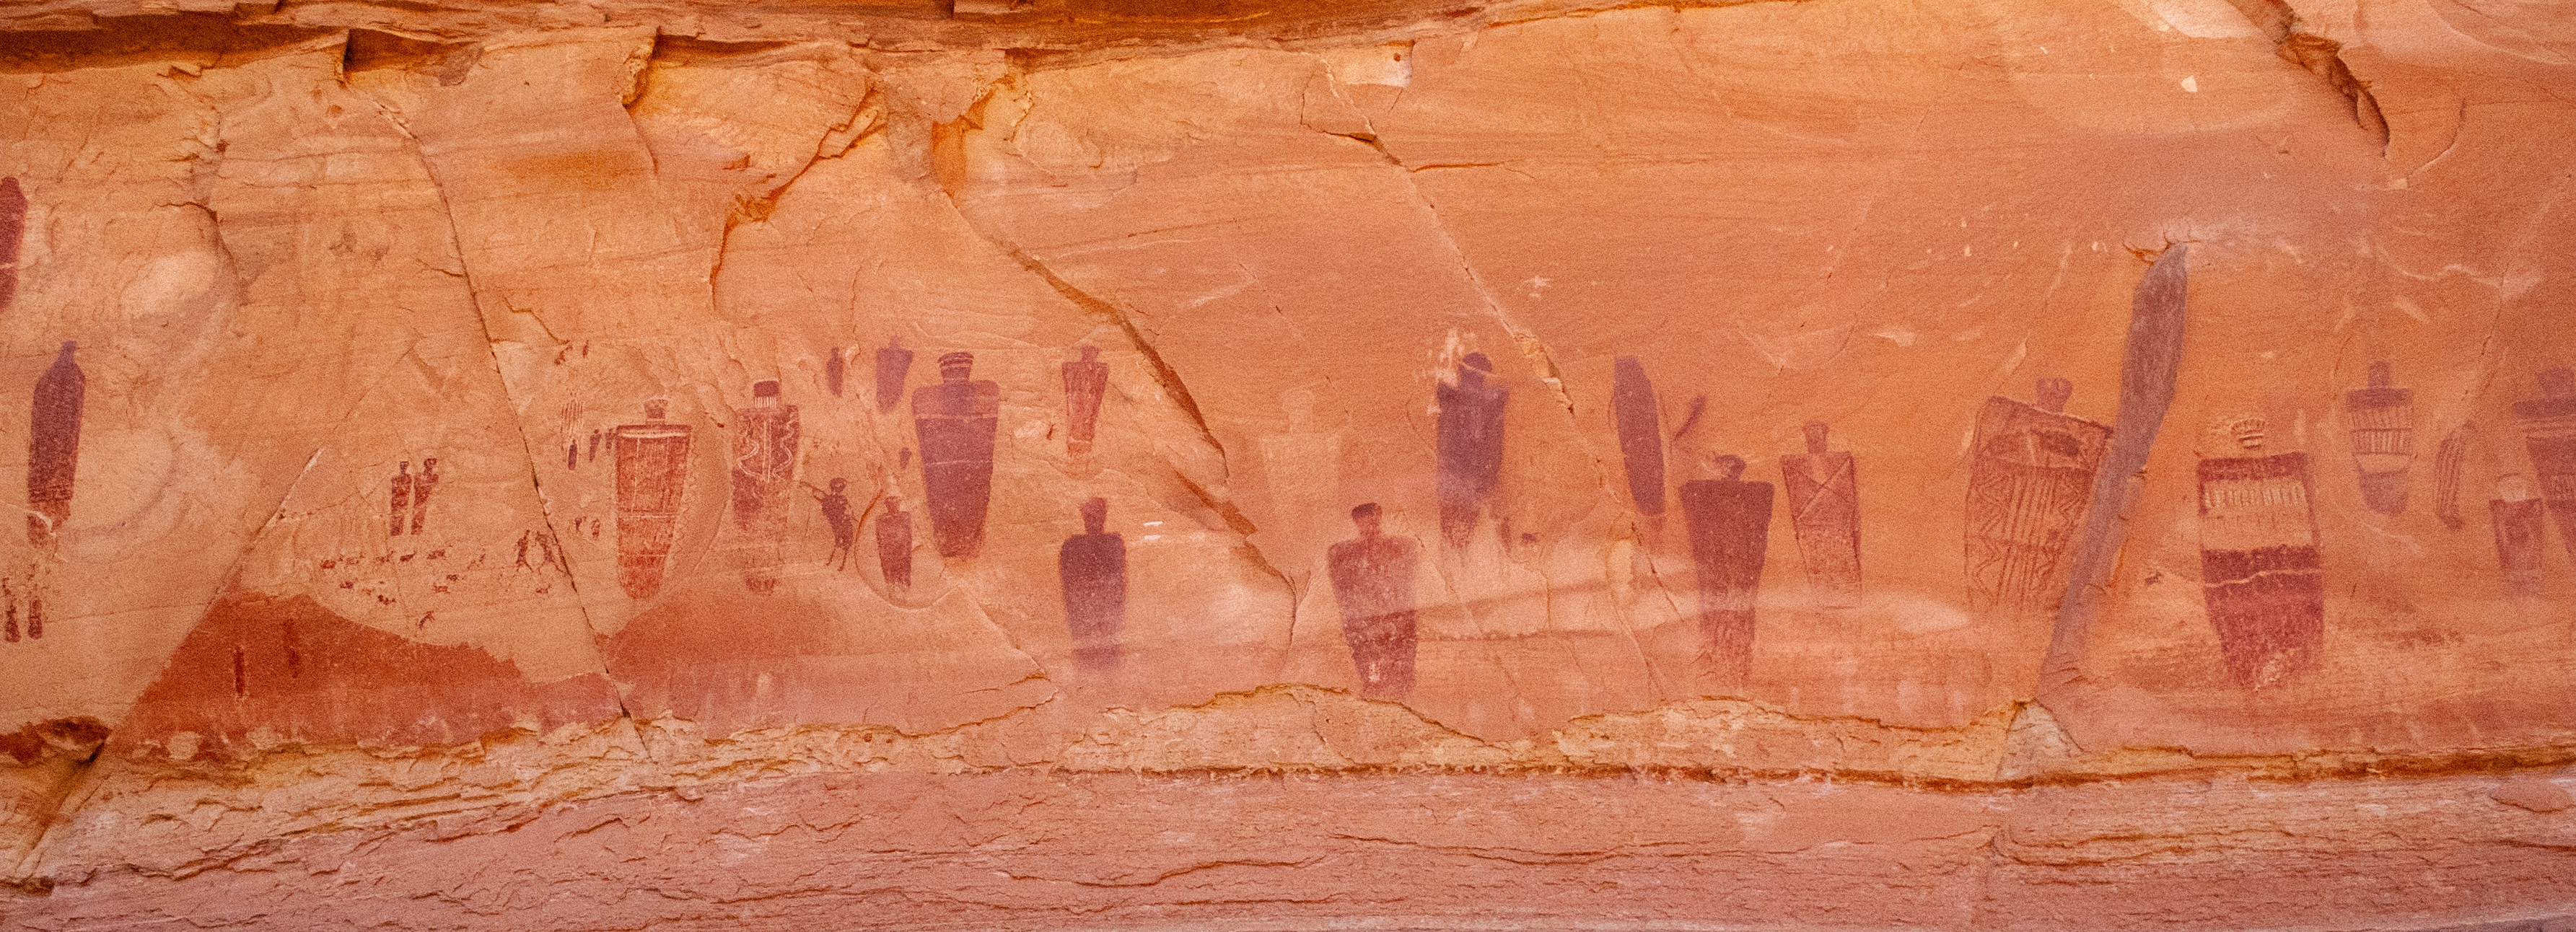
After what felt like forever, we finally reached the canyon's highlight: the pictographs. These ancient rock drawings were created between 2,000 and 5,000 years ago.
They were stunning — beautifully preserved and much larger than I expected. I managed to get some great shots here, and the shaded alcove gave us a much-needed chance to rest.

Unfortunately, reaching the pictographs meant we were only halfway through Horseshoe Canyon. The remaining miles were brutal.
Around this time, I ran out of water. I was surprised to find my CamelBak already empty. Thankfully, others in the group had extra — without that, I could’ve been in serious trouble.
Eventually, we reached the final ascent out of the canyon. I had been hoping the sandy terrain would finally give way to something firmer — I was wrong.
The sand continued for about a third of the climb. The ropes that had helped us conquer rappels earlier in the day were now just dead weight in our packs.
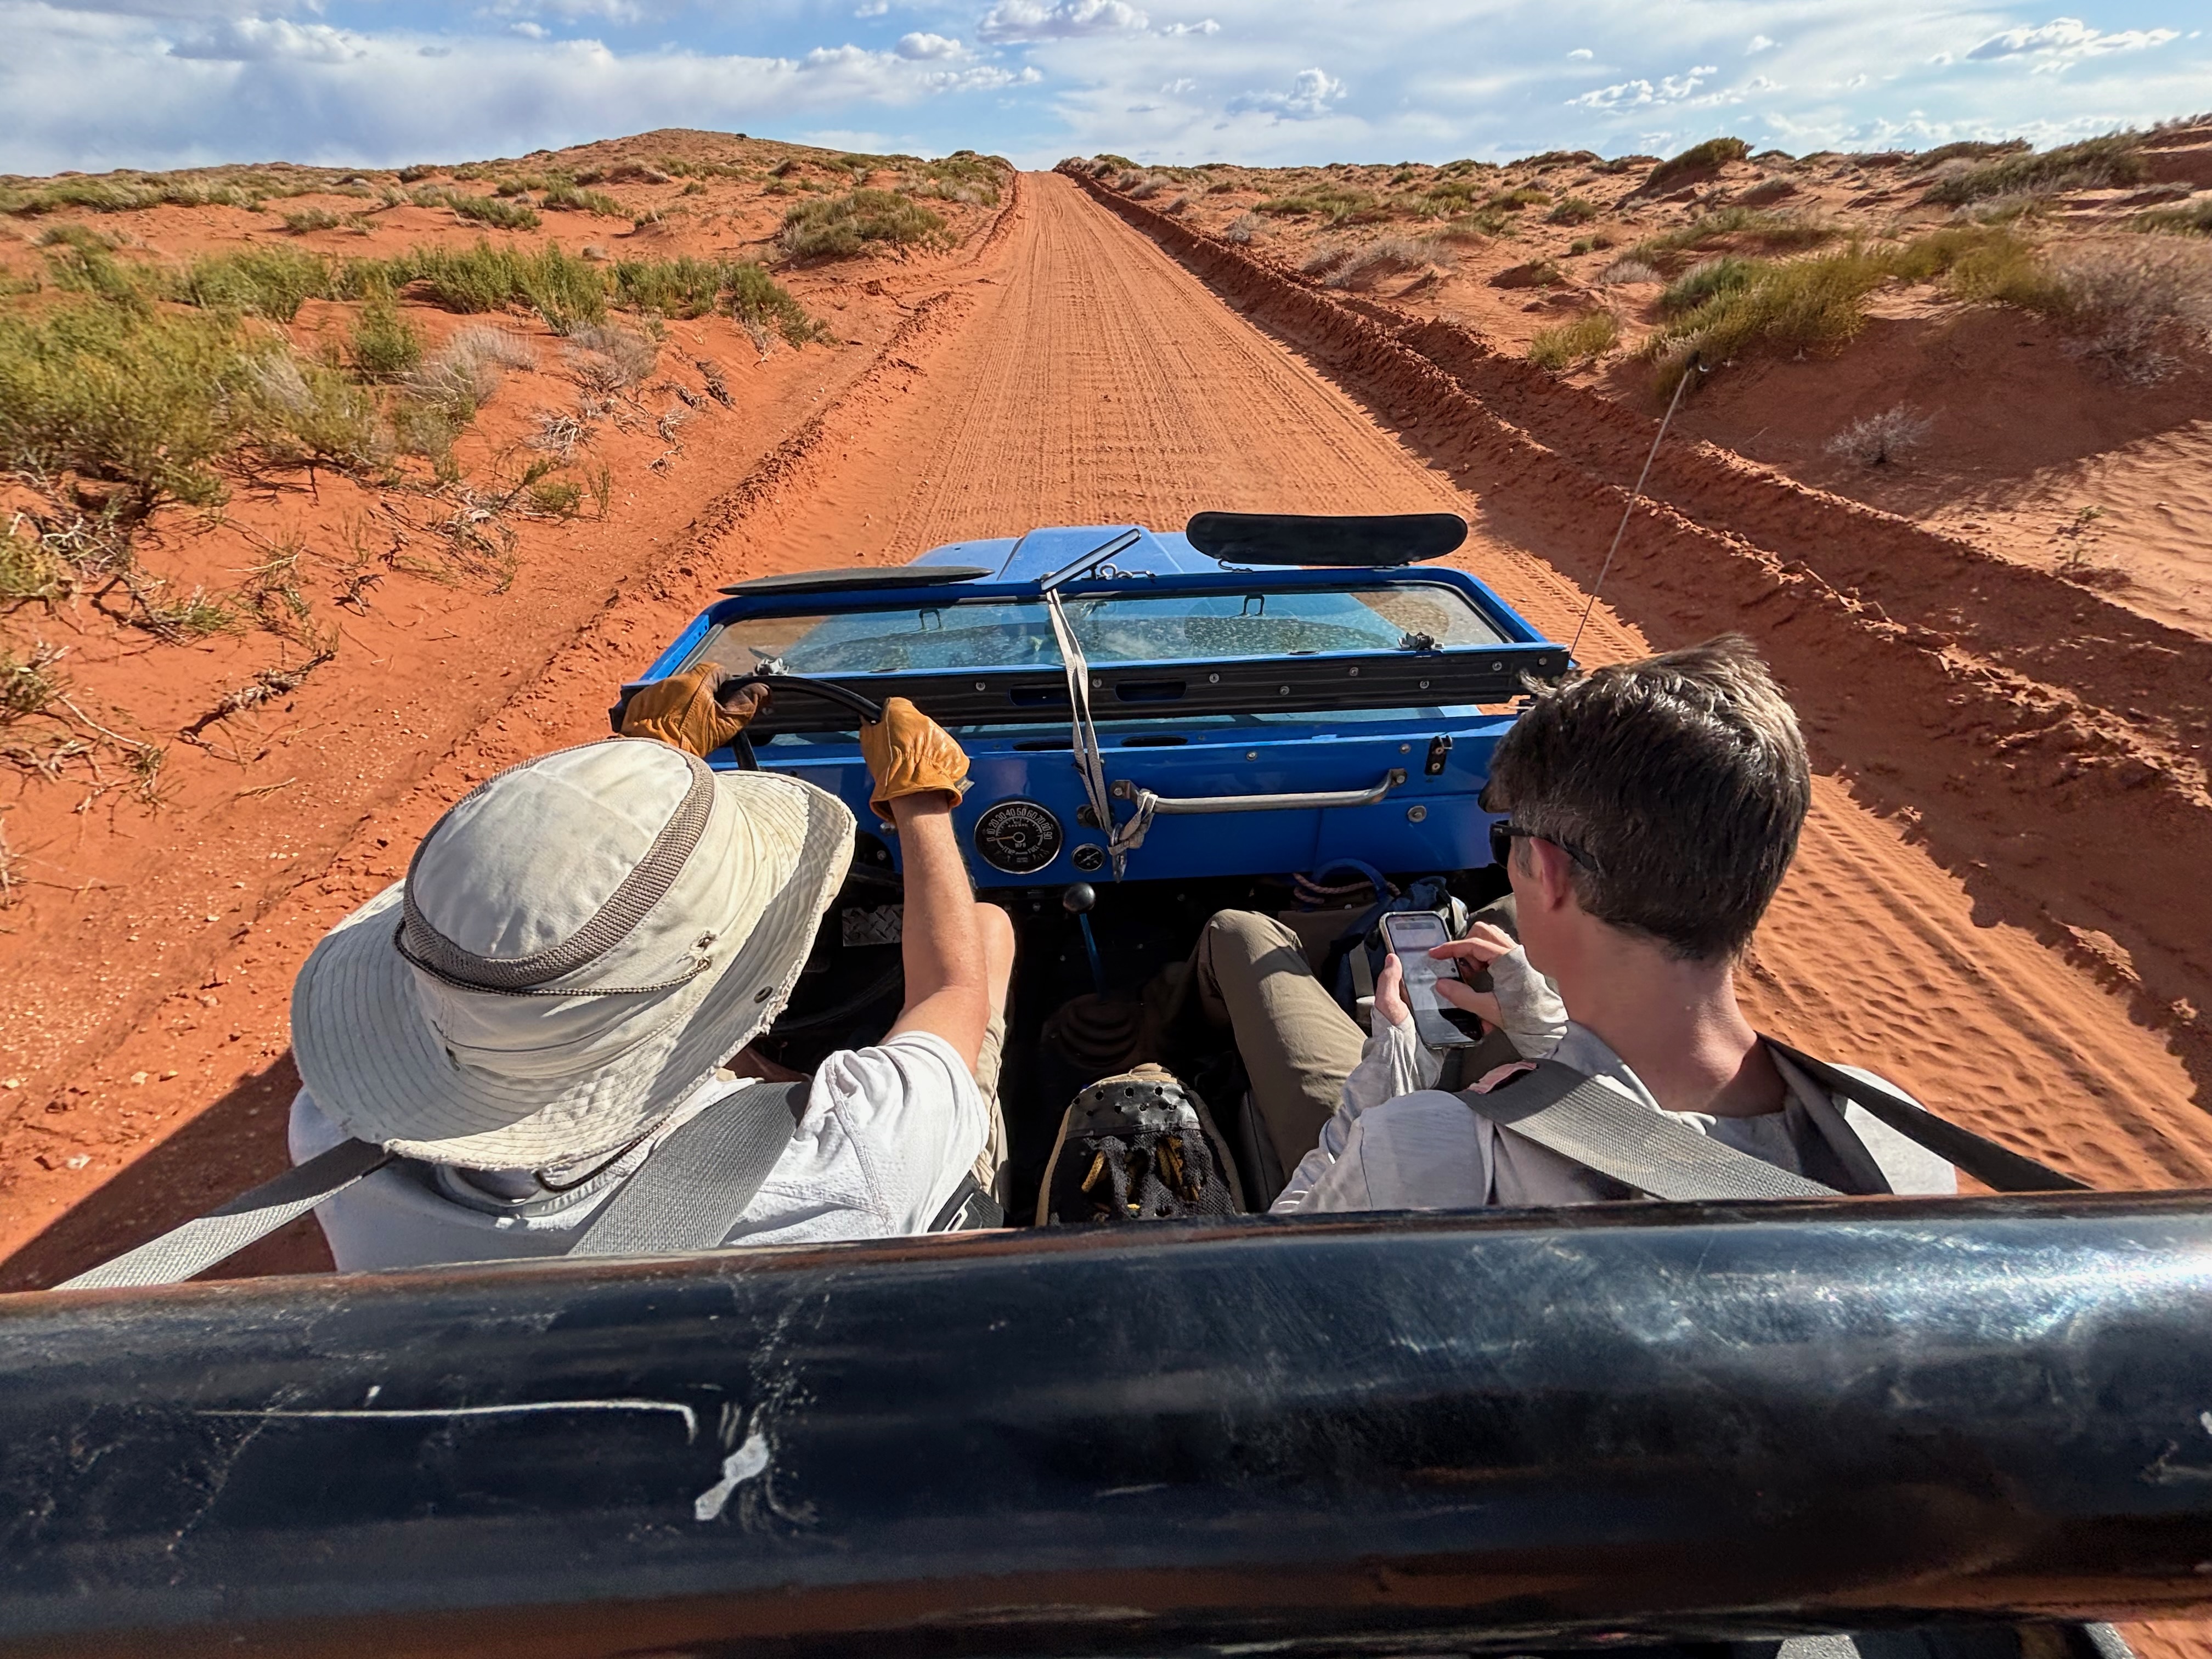
I was completely spent. Seeing that blue Jeep we’d left at the Horseshoe Canyon trailhead was like spotting an oasis.
I dropped to the ground and leaned against a tire, totally wiped out. We had water stashed in a plastic container that looked like a gas can. I took a long drink and let some pour over my head.
The five of us squeezed into the Jeep and drove to retrieve our main vehicle from the start of the route. As we bounced along the dirt road, a sharp cramp shot through my leg — a final reminder that I should’ve brought some electrolytes.
We hitched the Jeep to the main car and finally set off for home.

This was one of those trips where, right after finishing, you say, “That was amazing... but I’m never doing that again.”
Then a few months pass, and the pain fades, and you find yourself thinking, “Dang, I really want to go back.”
All said, it’s one of the coolest canyoneering adventures I’ve ever done. The challenge, the scenery, the sense of wild isolation — Blue John Canyon is a must-do.
Tips & Things to Know
- This is not a beginner route — know basic canyoneering and have the right gear.
- Don't do this alone, go with experienced and capable people
- Car shuttle required.
- Watch the weather — flash floods can be deadly in this canyon.
- Cell signal is basically nonexistent.
- Start early. Heat and time are your biggest challenges.
- Bring plenty of water and electrolytes